Volume 5 Number 1
©The Author(s) 2003
A Study of Bones
Abstract
This article describes a study of bones undertaken by 5-year-old children in a bilingual school in Mexico City. The article discusses the process and shows the results achieved by the children during the three phases of the project through photographs and other documentation of the children's work. The article concludes with reflections by the author and parents.
Background Information
Eton School is a bilingual (Spanish-English) institution in Mexico City. The school's population mainly consists of Mexican children who do not speak English at home. In the Early Childhood Department that serves children ages 2 to 6, children are instructed only in English. Our school becomes bilingual from 1st through 12th grade (ages 7-19). Because our young children are just starting to be exposed to English, many teachers feel that it would be virtually impossible for them to hold discussions or ask questions in the language they are learning. However, this article indicates that project work can be done with young children who are schooled in a full immersion program in a second language.
Emerging Project and Preliminary Planning
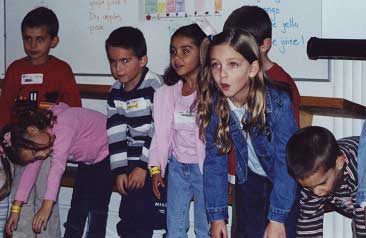
During September, the kindergarten children had been working on a theme about the human body. The children started telling personal stories about their experiences with doctors and getting hurt, and they expressed a special interest in accidents and broken bones.
The teacher brought in several X-rays, a pair of crutches, and some items such as knee braces and air casts that the children could use for role-playing activities. She wanted to see if the children's interest in this topic was intense enough to start an in-depth study. She explored whether she could invite an expert and whether it would be possible to visit an X-ray room at a clinic or a hospital. Everything fell into place, and the teacher decided to take on this topic to pursue a project.
 Figure
1. Liam tried on an air cast.
Figure
1. Liam tried on an air cast. 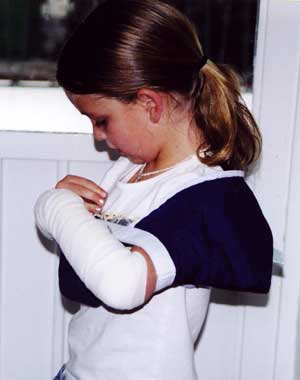 Figure
2. Teli pretended to hurt her arm.
Figure
2. Teli pretended to hurt her arm.
Phase 1
The teacher and principal discussed the interests of the children and the conversations held by the children during role-play, which the teacher had recorded as she walked around the classroom with a notepad. Together they made a web to visualize the possibilities for developing the topic.
 Figure
3. The teacher and principal created a topic web
about bones based on the children's conversations.
Figure
3. The teacher and principal created a topic web
about bones based on the children's conversations.
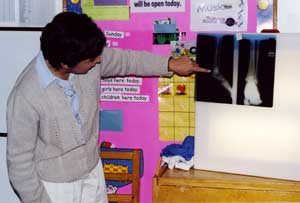
The principal came to the classroom and told a story about how she hurt her ankle. She explained why she needed to wear an air cast and demonstrated how to put it on.
 Figure
4. The principal told a story about how she hurt her ankle.
Figure
4. The principal told a story about how she hurt her ankle.
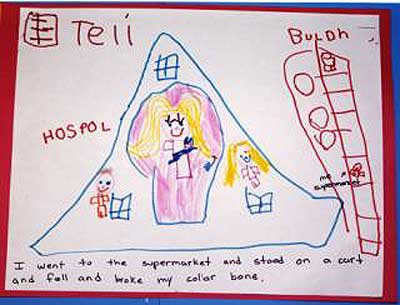
Children started telling personal stories about their family members or friends breaking a bone. Teli, one of the girls in the class, told a story about breaking her collarbone when she fell from a cart at the supermarket.
 Figure
5. Teli told a story about breaking her collarbone.
Figure
5. Teli told a story about breaking her collarbone.
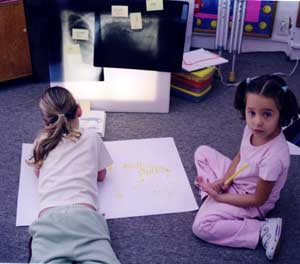
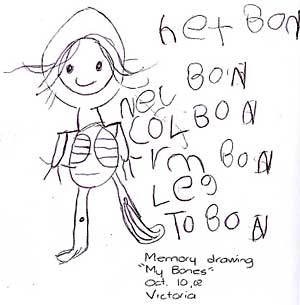
The children made memory drawings of their bones and then shared their drawings during a class meeting.
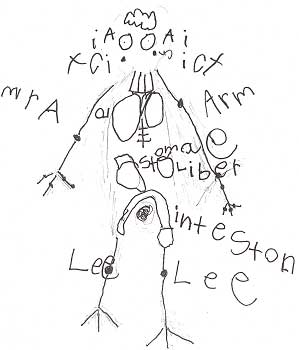 Figure 6. The children made memory drawings of their bones.
 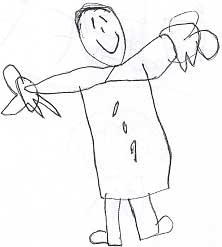 Figure
7. The outside of the body.
Figure
7. The outside of the body.  Figure
8. The inside of the body.
Figure
8. The inside of the body.
The children started asking questions about bones, and the teacher wrote them down and displayed them on a poster board in the classroom.
- How many bones do we have?
- What is inside our bones?
- How does the doctor know when a bone is broken?
- What things does a doctor use?
- Are people's bones the same as dogs' bones?
- What does an X-ray machine look like?
- How does an X-ray machine work?
- How does a cast get hard?
- Are there many colors of casts?
- What happens when a cast gets wet?
- How can a person take a cast off?
- What kind of shoes do you wear when you are wearing a cast on your foot?
- Do many children have broken bones?
- What animals have bones?
- How can we take care of our bones?
A girl brought an X-ray of her dog, and we compared it to an X-ray of human bones. We made a Venn diagram to record the data.
 Figure
9. The children compared an X-ray of a dog with an X-ray of human
bones.
Figure
9. The children compared an X-ray of a dog with an X-ray of human
bones.  Figure
10. The teacher made a Venn diagram with the information the children
dictated.
Figure
10. The teacher made a Venn diagram with the information the children
dictated.
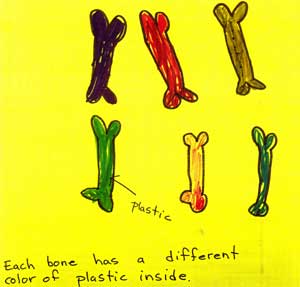
The principal brought in some chicken bones, and the children looked at them using a magnifying glass. Next, they shared their predictions of what they thought was inside bones, and they drew and labeled drawings of bones.
 Figure
11. Some children predicted that "Each bone has a different
color of plastic inside."
Figure
11. Some children predicted that "Each bone has a different
color of plastic inside." 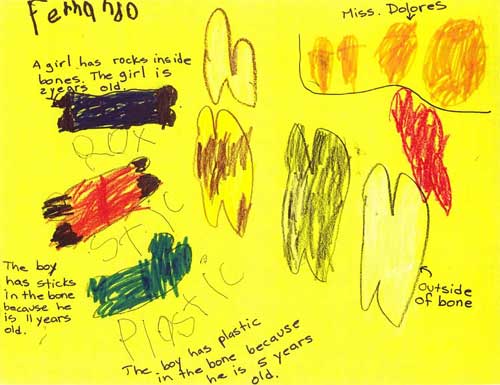 Figure
12. Some children thought that what is inside our bones changes
as we grow: "A girl has rocks inside her bones because she is 2 years
old. The boy has plastic inside his bones because
he is 5 years old. The boy has sticks inside his bones because
he is 11 years old."
Figure
12. Some children thought that what is inside our bones changes
as we grow: "A girl has rocks inside her bones because she is 2 years
old. The boy has plastic inside his bones because
he is 5 years old. The boy has sticks inside his bones because
he is 11 years old."
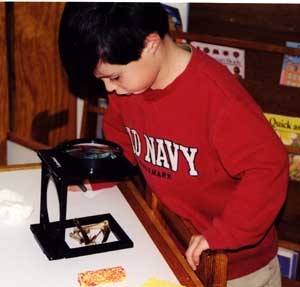
After a couple of days, we broke open the chicken bones and put them under a magnifying lens. The children carefully examined them and made an observational drawing. Later on, they compared their predictions to what they saw. They enjoyed this activity immensely, and when they shared their findings during group time, all the children laughed at their predictions.
 Figure
13. A child looked at the inside of chicken bones through a magnifying
lens.
Figure
13. A child looked at the inside of chicken bones through a magnifying
lens. 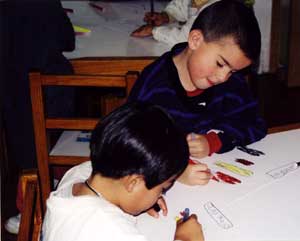 Figure
14. The children made observational drawings of the inside of
a chicken bone.
Figure
14. The children made observational drawings of the inside of
a chicken bone. 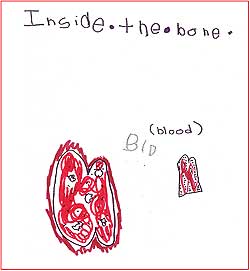 Figure
15. Observational drawing.
Figure
15. Observational drawing.
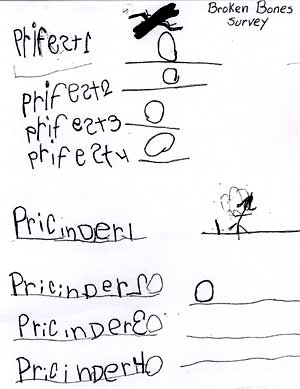
One group of children was interested in finding out how many children at school had broken bones at that moment. They designed a form to conduct a survey, and they surveyed all the classrooms. They found out that one child had a broken arm.
 Figure
16. As this survey form shows, the children
found a girl with a broken arm in the pre-kindergarten 1 class.
Figure
16. As this survey form shows, the children
found a girl with a broken arm in the pre-kindergarten 1 class.
Phase 2
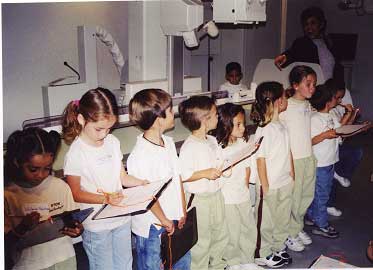
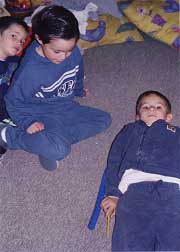
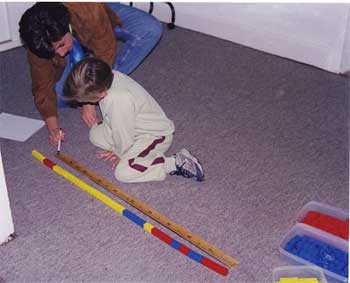
In preparation for our field visit, the children predicted what they thought they were going to see at the clinic. The teacher displayed their predictions on a poster board in the classroom so that they could revise their predictions after the trip. Most of the children were particularly interested in seeing the X-ray machine. Before the trip, they made predictions as to how long the machine would be. The measurement was estimated by calculating the number of children that would make up the length of the machine.
 Figure
17. The children predicted how long the X-ray machine would be.
Figure
17. The children predicted how long the X-ray machine would be. 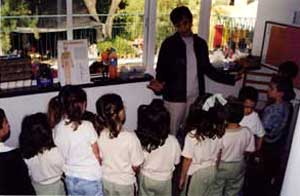 Figure
18. The children lined up to estimate the length of the X-ray
machine.
Figure
18. The children lined up to estimate the length of the X-ray
machine.
When we arrived at the clinic, Teli's grandfather, a doctor who works there, was waiting for us in the parking lot. He first took us to visit the lab. There, children were able to look at blood samples through a microscope. Children recalled that bone marrow is inside their bones. The teacher commented that blood cells are produced inside our bones.
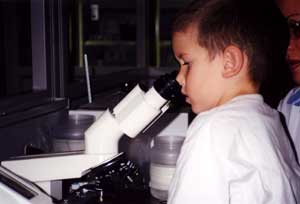 Figure
19. The children looked at blood samples through a microscope.
Figure
19. The children looked at blood samples through a microscope.
Some children made observational drawings of the microscope and what they saw.
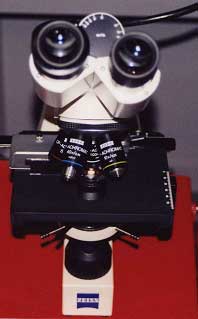
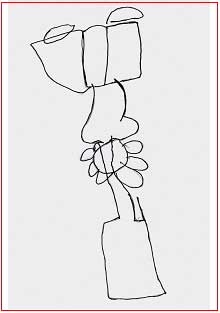 Figures
20-21. Photograph and field sketch of a microscope.
Figures
20-21. Photograph and field sketch of a microscope. 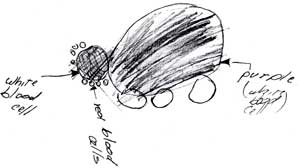 Figure
22. "This is what I saw through the microscope."
Figure
22. "This is what I saw through the microscope."
Then, we proceeded to the Radiology Department. The children had a chance to see a computer monitor where doctors look at X-rays. We saw images of how different bones look. Some children found this experience interesting and decided to take field notes.
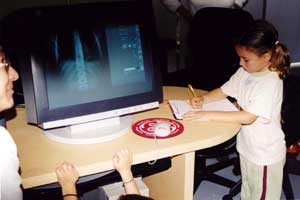 Figure
23. This child made a field sketch of the
computer, the physician, and what was displayed on the monitor.
Figure
23. This child made a field sketch of the
computer, the physician, and what was displayed on the monitor.
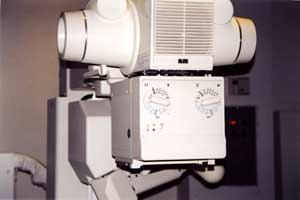
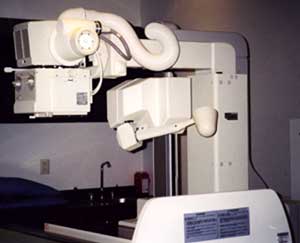
Next, we went to see the X-ray machine. The doctor demonstrated how the machine worked and how he took X-rays.
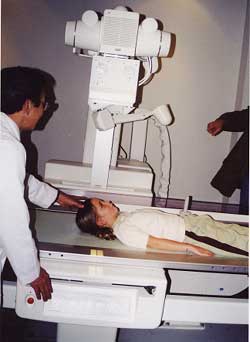
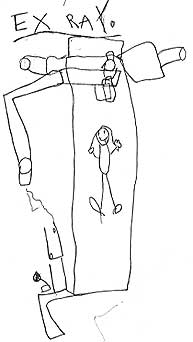 Figures
24-25. Photograph and field sketch of Teli on the X-ray machine.
Figures
24-25. Photograph and field sketch of Teli on the X-ray machine.
The children were allowed to stay in the room for a while to make field sketches of the machine and the room itself and to take field notes.
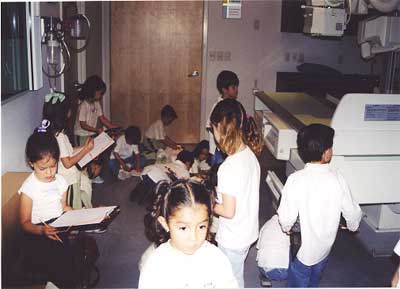 Figure
26. The children made sketches and took notes.
Figure
26. The children made sketches and took notes. 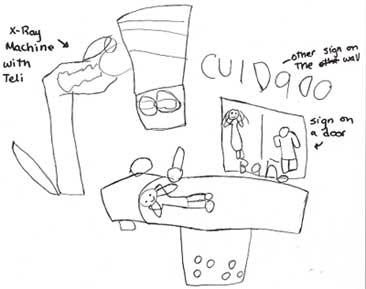 Figure
27. Field sketch made during the visit.
Figure
27. Field sketch made during the visit.
Then, the children sat in the X-ray room, and the doctor answered the questions that they had dictated to the teacher at school.
The children measured the X-ray table by lining up beside it to see whether their predictions matched the machine's real measurements. Carolina, who had predicted that the machine would be 100 children long, said,"What I said at school was really silly, now I know that the machine is only nine children long."
 Figure
28. The children measured the X-ray table by lining up beside
it.
Figure
28. The children measured the X-ray table by lining up beside
it.
After the visit, the children retold the story of their field experience. They recalled what they saw and compared their narration of the trip to the predictions made before the trip. They concluded that they did see sick people, doctors, nurses, and the X-ray machine, but they did not see doctors' offices or tools.
After retelling the story, children worked on journal entries that expressed what had interested them most during the visit.
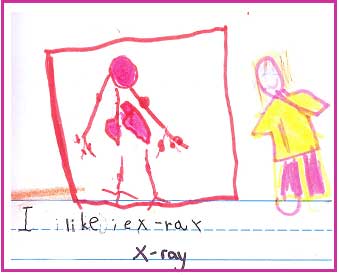 Figure 29. Journal entry after the visit.
 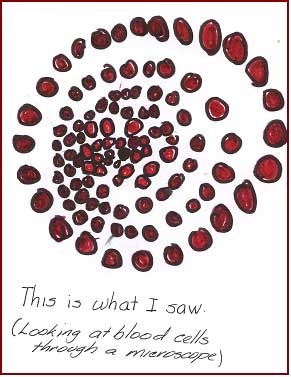 Figure
30. Memory drawing after the visit.
Figure
30. Memory drawing after the visit.
The following day, as we held our morning meeting, we realized that we had a lot to do. Children and teachers suggested work that needed to be done. We formed several groups, and the children selected what they wished to work on.
Representing Knowledge
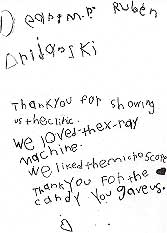
Writing a Thank-you Letter to Teli's Grandfather (the doctor who took care of us at the clinic). A group of children talked about the visit and what they wanted to write about. Some of them wrote about the bones and X-ray machine, and others drew pictures.
 Figure
31. The children wrote a thank-you note to the doctor.
Figure
31. The children wrote a thank-you note to the doctor. 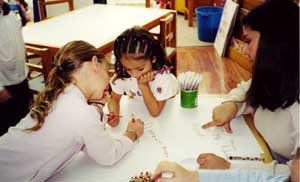 Figure
32. Children wrote about their experience or sketched.
Figure
32. Children wrote about their experience or sketched.
Becoming Bone Experts. Some children were interested in finding out names of bones and their location in our body. They worked in pairs and labeled a diagram of the skeleton by looking for information in books. Each of the children learned some names and shared his or her knowledge with the rest of the class at the end of the day when each group reported what the group had worked on during the session.
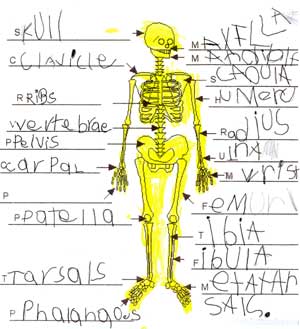
Figure 33. The children labeled a diagram of a skeleton.
A group of bone experts wanted to find out the length of different bones and proceeded to measure them using Unifix cubes. Some children measured the femur, others the humerus, others the radius, and so on. The teacher demonstrated how they could use a ruler to measure the length of their bones.
 Figure
34. Children measured the length of bones using Unifix cubes.
Figure
34. Children measured the length of bones using Unifix cubes. 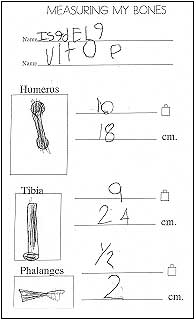 Figure
35. The children recorded the length of bones in Unifix
cubes and centimeters.
Figure
35. The children recorded the length of bones in Unifix
cubes and centimeters.
The children found out which bones in the body are the smallest and the biggest as well as the number of bones that make up the human skeleton.
Children in one group made observational drawings by looking at photographs in books.
 Figure
36. Comparison of the first memory drawing
and the observational drawing of the same child.
Figure
36. Comparison of the first memory drawing
and the observational drawing of the same child. 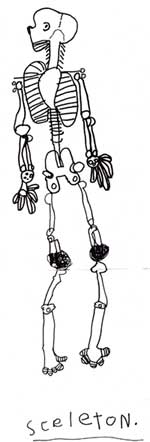
Figure 37. Observational drawing.
Building Bones. One group of children first drew a big plan of what they wanted to do, which showed the outside and the inside of the bone. They labeled the different parts of a bone and included words such as bone marrow and red blood cells.
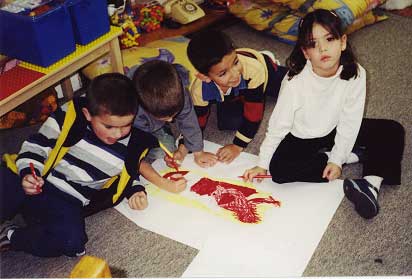
Figure 38. A group of children drew the outside and inside of the bone.
Next, the children decided which bone each wanted to build by looking at a diagram. The teacher wrote their names beside the bones they selected so that they would have a visual reference when working.
 Figure
39. The teacher wrote the children's names
next to the bone they wanted to investigate.
Figure
39. The teacher wrote the children's names
next to the bone they wanted to investigate.
The children selected the things they needed and started building different bones. They used recyclable materials for the outside and sponge for the inside. They later painted their creations and labeled them. This group of children worked for four sessions until their bones were completed.
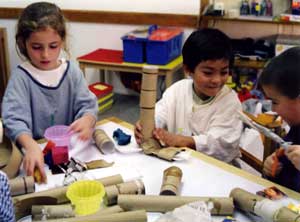 Figure 40. Juan Pablo built the foot using cardboard tubes and
plastic forks.
Figure 40. Juan Pablo built the foot using cardboard tubes and
plastic forks. 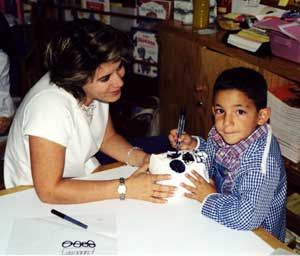 Figure 41. One of our mothers helped Alvaro build a skull.
 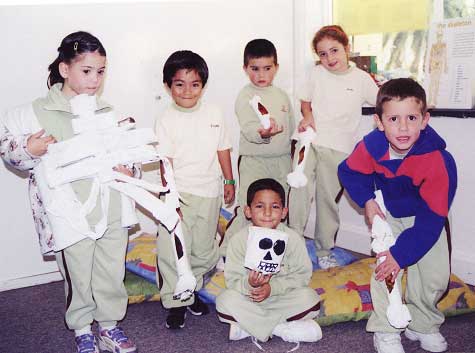 Figure
42. These children showed their creations to their classmates.
They placed them on top of the bones they intended to build.
Figure
42. These children showed their creations to their classmates.
They placed them on top of the bones they intended to build.
Building an X-Ray Machine. Some children looked at the pictures of the X-ray machine taken during the field visit. They discussed them and made a list of things they needed in order to build the machine. Then they proceeded to number the pictures so that they could each be in charge of building a specific part. Next, they drew an enlarged floor plan of how the machine should look.
 Figure
43. The children created a list of things needed to build
the X-ray machine.
Figure
43. The children created a list of things needed to build
the X-ray machine. 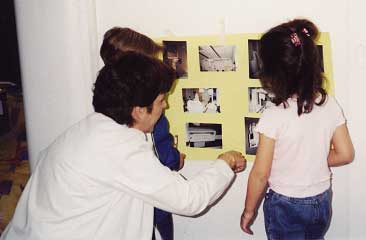 Figure
44. The children looked at the pictures taken during
the field visit. They selected the part they were interested
in building.
Figure
44. The children looked at the pictures taken during
the field visit. They selected the part they were interested
in building.
One child thought about the length of the machine and represented it with Unifix cubes. "I want the machine to be 48 Unifix cubes long." The teacher used a meter stick to measure the cubes that were lined up on the floor in order to model for the child how things can be measured in different ways. The child helped her, and the teacher said, "48 Unifix cubes is the same as 1.9 meters."
 Figure
45. The teacher used a meter stick to measure the
Unifix cubes a child used to represent the length of the machine.
Figure
45. The teacher used a meter stick to measure the
Unifix cubes a child used to represent the length of the machine.
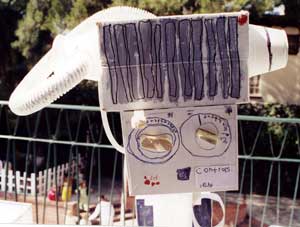
The children selected recyclable materials and started to work on their machine. They observed the pictures closely because they wanted it to resemble the "real thing" as closely as possible. They labeled the parts of the machine and wrote down each part's purpose. The children completed this piece of work after six sessions.
 Figure
46. The children looked for boxes that matched the parts
of the machine that they intended to build.
Figure
46. The children looked for boxes that matched the parts
of the machine that they intended to build. 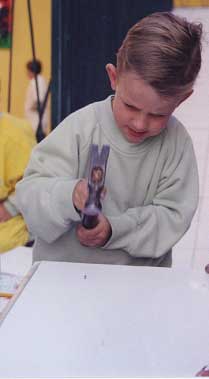 Figure
47. Dan used a hammer to add on a piece of wood in order
for the machine's table to be the length that he had decided
on.
Figure
47. Dan used a hammer to add on a piece of wood in order
for the machine's table to be the length that he had decided
on. 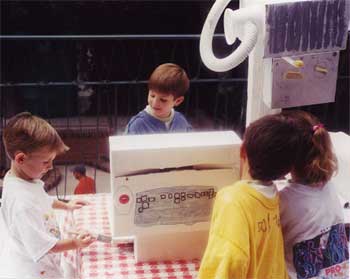 Figure
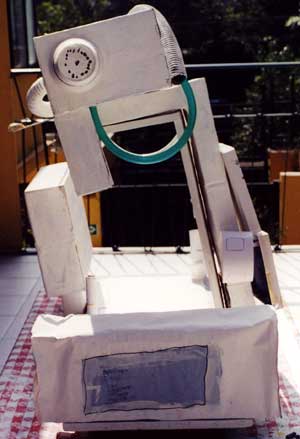
48. The children completed the machine in six sessions.
Figure
48. The children completed the machine in six sessions.
We were all amazed by the resemblance of the children's creation to a real X-ray machine.
 Figures
49-50. The children wrote a label that read: "This part of
the machine controls light."
Figures
49-50. The children wrote a label that read: "This part of
the machine controls light." 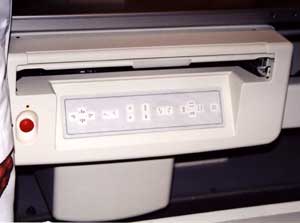
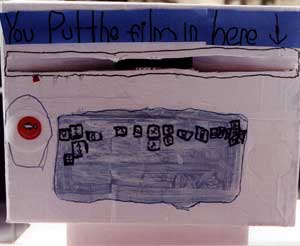 Figures
51-52. The children indicated that film for the X-ray machine
is introduced through the slit on the machine.
Figures
51-52. The children indicated that film for the X-ray machine
is introduced through the slit on the machine.
 Figures
53-54. The children were very happy with their creation.
Figures
53-54. The children were very happy with their creation.
New Questions Arise: Who Has Bones?
At the beginning of the work session, the teacher held a group meeting. Sharian had brought some human bones, and she wanted everyone to see them. Several children commented that their parents had animal bones at home. The teacher encouraged the children to bring the bones to class, and she added that the bones could be displayed for everyone to see. A discussion started about whether all animals had bones, and children mentioned some animals that did and some that did not. The teacher then asked if they thought fish had bones. One child collected the data of who thought fish did or did not have bones. She used tally marks as she asked every child. Then she counted the tally marks in order to find out what most children thought. The teacher then asked,"How can we find out if a fish has bones?"
Ximena: "We can
ask a vet."
Victor: "We can ask a doctor."
Valeria: "We can get a fish and open it to see."
Most children seemed very interested in the last option, and the teacher agreed to try it out.
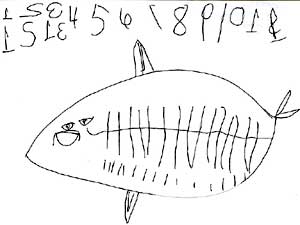
Some children made memory drawings of what they thought was inside a fish. One child was thinking to himself for quite a while. The teacher approached him and asked, "Eddy, is something wrong?" He shook his head to say no. "What do you think is inside a fish?" Eddy said, "a skeleton," so the teacher encouraged him to draw what he thought the fish's skeleton looked like, and the drawing in Figure 55 is what he came up with.
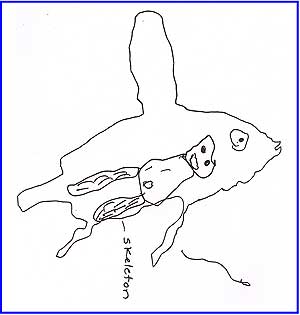 Figure
55. A child made a memory drawing of the inside of a fish.
Figure
55. A child made a memory drawing of the inside of a fish.
During the next work period, the children were able to find out firsthand whether fish have bones by opening one in the science lab.
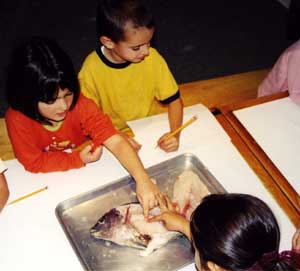 Figure
56. The children touched the bones.
Figure
56. The children touched the bones. 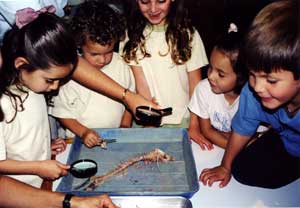 Figure
57. The children looked closely at the bones and counted
them to find out how many bones make up a fish's skeleton.
Figure
57. The children looked closely at the bones and counted
them to find out how many bones make up a fish's skeleton.
The children made observational drawings of the fish and wrote down the number of bones they counted.
 Figure
58. The children made observational drawings of the fish.
Figure
58. The children made observational drawings of the fish.
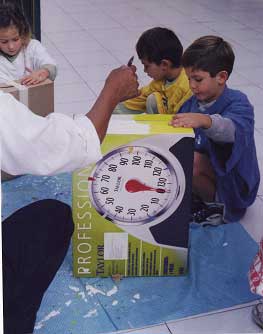
As the children continued to talk about animal bones, they brought some from home and were able to share them with their classmates. They also weighed animal bones and compared the data.
 Figure
59. The children weighed a bull's bone.
Figure
59. The children weighed a bull's bone. 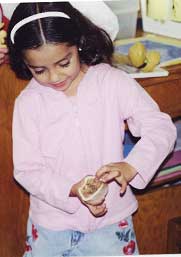 Figure
60. A child showed a bone she brought from home that her
grandmother used to make beef broth.
Figure
60. A child showed a bone she brought from home that her
grandmother used to make beef broth.
Some children decided to write a book about animals that have bones. They made it by drawing the animal's skeleton on an acetate sheet and the animal on paper, and then they made them overlap.
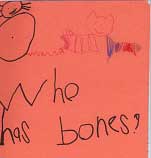 Figure
61. The cover of a book the children made about animals
that have bones.
Figure
61. The cover of a book the children made about animals
that have bones. 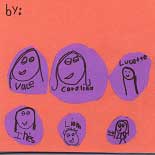 Figure
62. Author's page
of the book.
Figure
62. Author's page
of the book. 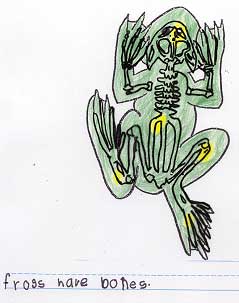 Figure
63. One of the pages in the book.
Figure
63. One of the pages in the book.
Several children were still insisting on finding answers to some of their previous questions that were unanswered so we decided it was time to ask an expert to come to our classroom. The teacher talked to an orthopedist and asked him to focus on answering the child's questions that she posed to him prior to his visit.
- What is a cast made of?
- What colors of casts are there?
- What happens if a cast gets wet?
- How do you get a cast off?
- How long does it take for a cast to get hard?
- How are bones held together?
- How can we take care of our bones?
- Why do we have bones?
- What is each part of the X-ray machine for?
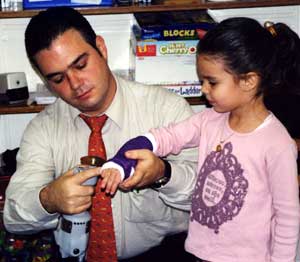 Figure
64. Andrea volunteered to have a cast placed on and removed
from her arm.
Figure
64. Andrea volunteered to have a cast placed on and removed
from her arm. 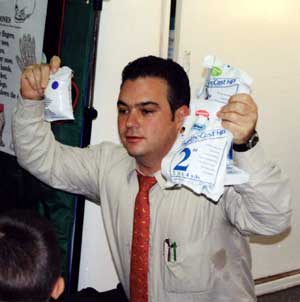 Figure
65. The doctor showed the children the different colors
of casts.
Figure
65. The doctor showed the children the different colors
of casts.
The orthopedist placed a cast on a child's arm. The children looked at a clock to find out how much time it took for the cast to get hard. The orthopedist also explained how we can take care of our bones. He answered their questions, and they also got a chance to look at his tools.
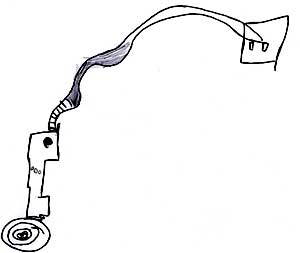 Figure 66. "This is the saw the doctor used to
remove the cast from Andrea's arm" field sketch.
Figure 66. "This is the saw the doctor used to
remove the cast from Andrea's arm" field sketch.
A New Area of Interest: Taking Care of Our Bones
The day after the physician's visit, a child brought a helmet from home. He explained that he used it when he rode his bike and that it helped him take care of his skull. During the next few days, several children brought in diverse gear that protected their bones against injuries. They tried on the gear and used the equipment for role-play.
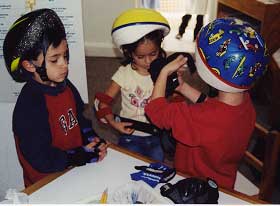 Figure 67. The children played with equipment that protected their
bones.
Figure 67. The children played with equipment that protected their
bones.
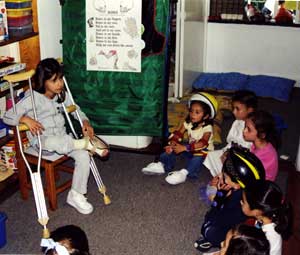
While the children were role-playing with the equipment, we were surprised by an unexpected visitor. She was one of our former preschool children who had a broken leg. We invited her into our classroom, and she shared her personal story with the children. She also allowed the youngsters to use her crutches.
 Figure
68. One of our former preschool children shared the story
of her broken leg.
Figure
68. One of our former preschool children shared the story
of her broken leg. 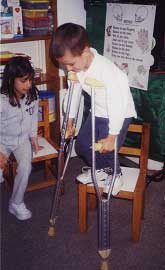 Figure
69. The children tried the girl's crutches.
Figure
69. The children tried the girl's crutches.
Because the children's interest focused on how to take care of their bones, the teacher brought in several food items that contain calcium. They cooked macaroni and cheese and tasted different dairy products.
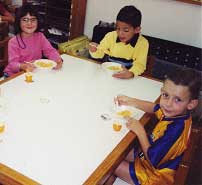 Figure
70. The children made macaroni and cheese and tasted different
dairy products.
Figure
70. The children made macaroni and cheese and tasted different
dairy products.
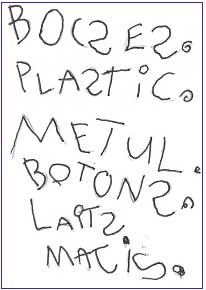
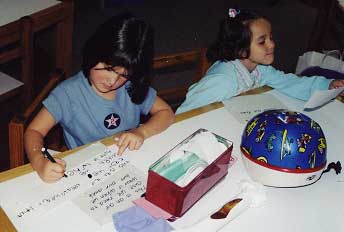
A group of children decided to become calcium detectives, and they looked for the word calcium on labels and boxes of food products to determine whether they were good for their bones.
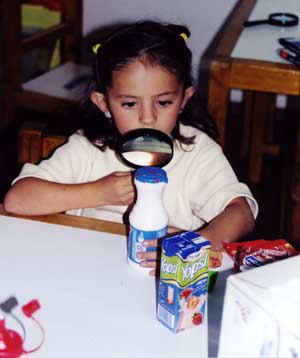
 Figure
71-72. A group of children wrote a list of products that contain
calcium.
Figure
71-72. A group of children wrote a list of products that contain
calcium.
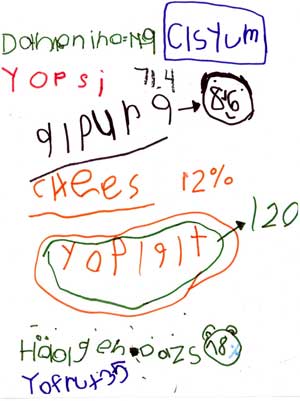
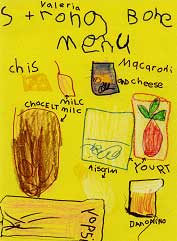
The calcium detectives thought that it would be a good idea to tell their classmates about products they could eat to make their bones strong. They designed "Strong Bone Menus," which they shared with their peers. The menus were later displayed in the classroom for everyone to see.
 Figure
73. The children designed a "Strong Bone Menu."
Figure
73. The children designed a "Strong Bone Menu."
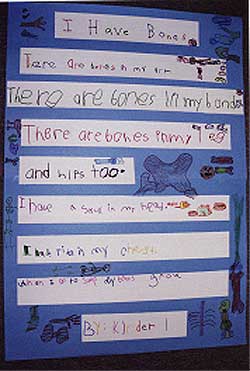
The whole class contributed to writing an original poem about bones, which all of the children learned.
 Figure
74. The class wrote a poem about bones.
Figure
74. The class wrote a poem about bones.
I Have Bones
There are bones
in my arm.
There are bones in my hands.
There are bones in my leg
and hips too.
I have a skull in my head.
I have ribs in my chest.
When I go to sleep my bones grow.
Originally, the last line of the poem read "When I go to sleep my bones rest," but one of the children argued that while we sleep our bones grow.
Getting Ready for the Bone Museum
Because the children had brought so many items related to the topic and had done so much work, the teacher started to wonder about how she could display everything. She came up with the idea of putting together a bone museum. The children received her suggestion with much enthusiasm, and they began to think about the work that needed to be done and the items that needed to be included. After a few discussions, they formed committees in order to divide the workload. The different groups were in charge of writing labels for the displays, designing the invitation, making a big sign with the title of the exhibit, taking care of snacks, and putting together the display cases.
 Figures
75-76. The children wrote labels and explanations describing the
different items displayed.
Figures
75-76. The children wrote labels and explanations describing the
different items displayed.
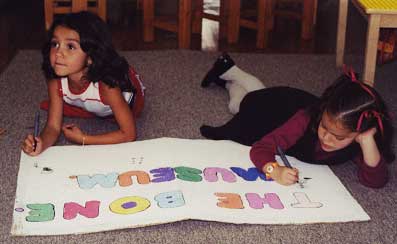 Figure
77. A group of children worked on a sign for the exhibit.
Figure
77. A group of children worked on a sign for the exhibit.
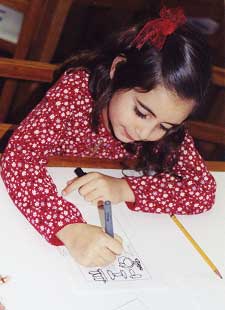
 Figures
78-79. Lucette designed the invitation that was sent to parents.
She attempted to write every letter in the shape of a bone.
Figures
78-79. Lucette designed the invitation that was sent to parents.
She attempted to write every letter in the shape of a bone.
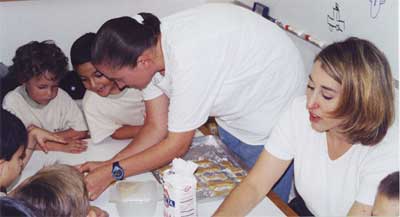 Figure 80. The teacher and one of our mothers helped the
children make bone-shaped cookies to serve as snacks during the
exhibit.
Figure 80. The teacher and one of our mothers helped the
children make bone-shaped cookies to serve as snacks during the
exhibit. 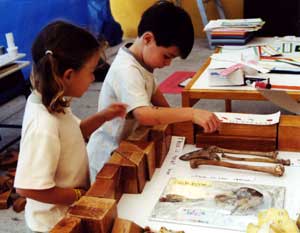 Figure 81. The children set up display windows using
wooden blocks and a large piece of transparent plexiglass.
Figure 81. The children set up display windows using
wooden blocks and a large piece of transparent plexiglass.
Phase 3: The Bone Museum
After six weeks of intense and productive work, our children's parents came to school to share with their children all that the children had learned about bones and to see their work.
The children sang a song and performed a dance about bones. Next, the teacher shared pictures and samples of work through a PowerPoint presentation, which she had used to document the project since its beginning.
 Figure
82. Every child wore a badge that read "Bone Expert." The children greeted their parents by performing a bone dance
and singing a song.
Figure
82. Every child wore a badge that read "Bone Expert." The children greeted their parents by performing a bone dance
and singing a song.
After the PowerPoint presentation, the Bone Experts shared their knowledge with their parents by answering the parents' questions. They were also able to ask the audience questions, and they had a lot of fun when their moms and dads did not know the answers.
 Figure
83. The children answered their parents' questions.
Figure
83. The children answered their parents' questions.
Parents were then
invited to visit the Bone Museum with their children.  Figure 84. The Bone Museum.
 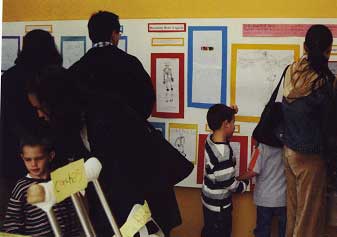 Figure
85. Children's work was displayed in a sequential order
of things that happened throughout the first two phases
of the project.
Figure
85. Children's work was displayed in a sequential order
of things that happened throughout the first two phases
of the project. 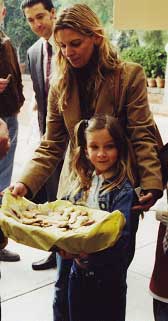 Figure
86. Guests enjoyed the bone-shaped cookies made by the children.
Figure
86. Guests enjoyed the bone-shaped cookies made by the children. 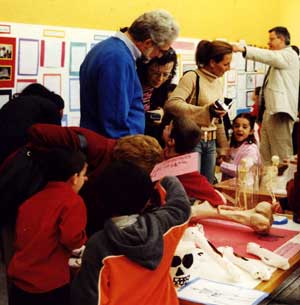 Figure
87. Parents visited the displays.
Figure
87. Parents visited the displays. 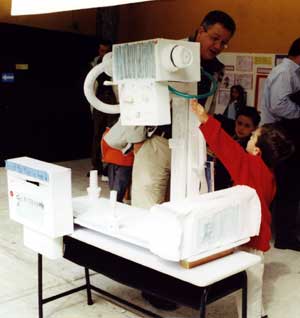 Figure
88. Carlos explained to his father how the X-ray machine
worked.
Figure
88. Carlos explained to his father how the X-ray machine
worked. 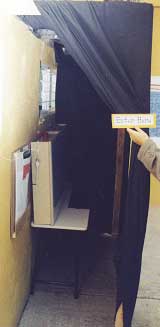 Figure
89. We set up a dark room where visitors could look at X-rays.
Figure
89. We set up a dark room where visitors could look at X-rays. 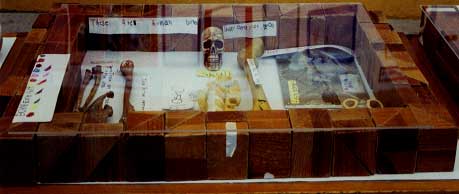 Figure
90. This display case included human and animal bones.
The children specified which were real and which were made out
of plastic.
Figure
90. This display case included human and animal bones.
The children specified which were real and which were made out
of plastic.
Conclusion
I had tried to do several projects in our school during the previous years. My knowledge about the Project Approach was based on reading all the books I could find on this subject. I had heard a few lectures at the National Association for the Education of Young Children (NAEYC) conferences, and I subscribed to the Project-L listserv. Because I am the principal of the Early Childhood Department at my school, it is my duty to motivate and instruct my teachers in order to provide the best education possible for our children. I knew that project work was the option I wanted them to follow. I tried to communicate my enthusiasm and my knowledge to my teachers as best as I could. A few teachers were successful, others were not, and some never concluded the projects they started. Many of my teachers argued that it was impossible to carry out project work in a second language with such young children, and they gave up even before trying. Our energy was renewed this year after Dr. Sylvia Chard came to teach a three-day workshop at our school. My teachers were excited, and I felt better prepared to guide them.
One of the teachers wanted to start doing project work right away, and together we carried out the Bone Project. At the beginning, our children had difficulty asking questions, and we wondered whether this difficulty was caused by the language barrier. However, as the study progressed, we understood that the children were not used to inquiring because most of the information had always been given to them. Once we did enough modeling, they started wondering and asking all sorts of questions. They would mix in words in Spanish if they did not have enough vocabulary in English, but they were able to express their thoughts and their ideas quite clearly. We now know that project work can certainly be carried out in a second language with young children.
Throughout the Bone Project, the kindergarten children were able to apply basic skills to solve real-life problems. They not only touched upon the requirements for their age and grade level, they surpassed our expectations of the knowledge they gained and the skills they acquired.
This project made a difference at our school because the children's self-motivation, excitement, interest, willingness to work hard, and their display of creativity and problem-solving abilities amazed other teachers who were reluctant to try project work.
Families had not been informed that we were working in a different way. Nevertheless, all of them knew that something had changed because the interest their children showed for this topic was reflected at home. Some parents shared these comments with us after the conclusion of the project:
As parents, we had always asked our son what he had done in school. His answer had always been the same—"nothing" or "I played"—up until the time when his class started learning about the topic of bones. We knew what he was doing at school right away because he would come home and talk about it. He got the whole family involved by sharing his knowledge and asking all kinds of questions. He spent time at home looking for meaningful things related to the project that he could take to school. Our son was extremely motivated, and we were amazed to see all that he had learned. (Fernando's parents)
I've always enjoyed sharing what my child does at school, but I was truly surprised when I saw Ines and her classmates take on a topic from so many different perspectives. They applied many skills: musical, manual, analytical, deductive, observational, scientific, culinary, and linguistic. This is the kind of education I want for my child: learning by pursuing her interests and not by memorizing irrelevant facts. (Ines' mother)
Acknowledgments
I wish to express my gratitude to Dr. Sylvia C. Chard for all that she has taught me and for her guidance and support, which enabled me to fully understand and fall in love with the Project Approach. I want to thank Ms. Ivette Alkón, the kindergarten teacher who had the vision and interest to pursue the study of this topic.
Author Information
Yvonne Kogan (M.E.) is currently the principal of the Early Childhood Department of Eton School in Mexico City and has been for the past 13 years. Her interests include project work and children's artistic development.
Yvonne
Kogan
Plan de Barrancas 96
Col. Lomas de Chapultepec
c.p. 11000
Mexico D.F.
Mexico
Email: kogan.yvonne@gmail.com