Volume 11 Number 2
©The Author(s) 2009
“Cheesy Pizza”: The Pizza Project
Abstract
A class of 3- to 5-year-old children in a midwestern child care center chose to study pizza restaurants as a group project. This article discusses how the project evolved, describes the three phases of the project, and provides the teachers’ reflections on the project. Photos taken during the project and children’s sketches are included.
School and Student Background Information
The Pizza Project described here took place in a university-affiliated child care setting in the midwestern United States. Illinois State University (ISU) Child Care Center serves 3- to 5-year-old children of ISU students, faculty, and staff in a full-day setting in a single classroom. The Project Approach is used as the basis of curriculum in the classroom. We began using the Project Approach in our mixed-age classroom in 1996.
Classroom enrollment is 20-25 children each semester. Three team teachers collaborate with teacher aides who are college students. Two of the teachers have master's degrees, and one teacher has a bachelor's degree with many graduate hours in early childhood education.
The majority of children attended for the full day, five days a week. Many of the children who participated in the Pizza Project had attended the child care center for more than one year. Most of the children in this classroom had been involved in project work previously. Seventeen children—6 girls and 11 boys—were enrolled at the time of this project. At the beginning of the project (in January), we had six 3-year-old children, six 4-year-old children, and five 5-year-old children. Only one child celebrated a birthday over the course of the semester. The youngest child at the beginning of the project was 3 years old. The oldest child at the beginning of the project was 5 years 3 months old. The project took place over the course of one semester, lasting from January through the end of April.
Preliminary Planning and Selection of the Topic
Every morning in our program, the children and teachers gather for Morning Meeting—a time when we discuss the current project, share information about the project, and plan that day’s work. Early in the semester, the teachers initiated a discussion about possible topics for a project investigation. We started out by reminding the children of the spider project that they had completed during the fall semester. The teachers told the children that we were ready to begin a new project. As part of the discussion, we pointed out that, before our holiday break, we had seen the children playing pizza restaurant as well as firefighters and police officers. The teachers commented that our class had easy access to pizza restaurants, a fire station, and a police station. We encouraged the children to think of other places nearby that they might find interesting to investigate. Burger King and a frozen yogurt shop were added to the list of possible project topics.
As the teachers talked with each other, a decision was made to pursue the topic of pizza restaurants. We knew that a Pizza Hut Express was located in the student center on campus and a Papa John’s Pizza restaurant was located within walking distance of our program. In reviewing the possible topics, the teachers evaluated how often the children had used each topic or theme in their dramatic play. We all felt that more of the children were involved in pizza restaurant play than any of the other topics. The teachers had been involved in projects about firefighters and police officers with other classes and thought we’d like to try a project topic that was new to us as well as to the children.
Phase 1: Beginning the Project
Phase 1 of project work sometimes includes discussions of experience, sharing knowledge and wondering out loud, raising questions, and preparing letters to parents. As part of our Phase 1 discussions, the teachers posed the following question: “Where can you get pizza?” The children generated quite an extensive list. The teachers recorded the list on a language chart, which was then posted in our classroom:
- Papa Murphy’s
- At Anderson or Fairview pools
- At the mall (Sbarro’s)
- At Saad’s Dad’s work
- Chicago Style Pizzeria
- Chuck E. Cheese
- Chili’s
- Make a Mess
- Grocery stores
- The Pizza Place
- Papa John’s
- Domino’s
- Truck Stop
- Jake’s Pizza
- Avanti’s
- Cosi’s
- Pizza Hut
- At home
- Micheleo’s
- ISU Food Service
- Subway
- Monical’s
Toward the end of Phase 1, the children dictated their versions of recipes for making pizza. Their dictated recipes reflected a range of understanding about what is involved in making pizza. For example, John, age 4, named two possible ingredients and compressed several steps into the statement “when you’re done doing everything, you cook it in the oven” (Figure 1). Rose (4 years, 7 months) included additional steps but was unsure of the cooking time (Figure 2). The teachers read each recipe to the group during Morning Meeting. Later, the recipes were posted in the classroom as part of our project documentation.
Figure 1. Pizza recipe by John: “Put flour and sugar in. Then, when you’re done doing everything, you cook it in the oven. It takes 14 minutes, actually 50 minutes.”
Figure 2. Pizza recipe by Rose: “You put flour and sugar in a bowl and then roll it out. Then put cheese on it. Then cook it in the oven for 6 minutes or something. Then I eat it.”
After about a week of discussions related to pizza, the teachers created an idea web with the children (Figure 3). The children told us information they knew about pizza and pizza restaurants. The teachers wrote down the children’s ideas in the form of a web, helping the children see ways to group similar ideas.
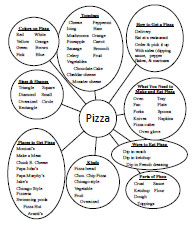
Figure 3. The children’s topic web (PDF).
Reflections on Phase 1
After listening to the children discuss pizza at Morning Meetings, it was clear to the teachers that this topic was of interest to almost every child in the program. Sometimes in a project, a few children will dominate discussions. In this case, we found that all the children were talking and contributing ideas and thoughts about their prior experiences.
We also realized that the children had a large amount of rich prior knowledge related to pizza and pizza restaurants. As we listened carefully, though, we found gaps in their knowledge that reinforced for us the value of this project topic. As we reviewed the recipes that the children had dictated, we realized that many of the children did not have a clear idea of how pizza was made, nor did they understand the various terms used to describe all the parts of a pizza. Also, in their dramatic play, they did not represent the act of paying or some of the nuances involved in ordering pizza for delivery (such as giving your address or phone number, tipping the delivery person, or understanding how the driver knew how to find a house). The children knew enough to begin formulating questions, but there was still plenty for all of us to learn as we explored the topic of pizza.
Phase 2: Developing the Project
Phase 2 of a project may include conducting fieldwork, discussing activities that are occurring in small groups, investigating questions that were formulated in Phase 1, having visits from experts, representing information learned during their investigations, and creating displays to share the children’s new knowledge.
Expert Visitor
As we proceed with any project, we display documentation in the hallway for parents and children to refer to as the project progresses. One of the parents read the hallway documentation about the Pizza Project and informed the teachers that she knew an ISU student who worked as a pizza delivery person. The teachers contacted the student, named Dan, and arranged a visit to the child care center.
Prior to Dan’s visit, the children dictated questions that they wanted to ask Dan about his job. The teachers emailed the questions to Dan for his review:
- What kind of vehicle do you drive to deliver pizza?
- How do you keep the pizza hot?
- Do you deliver pizza when it’s snowy?
- Do you put the pizza in the back of your truck?
- Do you put the pizza in a bag?
- What happens if you get lost? Have you ever been lost?
- What restaurant did you work for?
- What kind of pizza did your restaurant make?
- What kind of crust do you make?
- What kind of toppings do you have?
- Is the crust made out of dough?
- How do you know where to deliver the pizza?
- Do you have a cash register in your vehicle?
We learned that Dan had worked for Aurelio’s Pizza in the Chicago area. In anticipation of Dan’s visit, the teachers printed off the Aurelio’s Pizza delivery menu from the Internet and shared it with the children at Morning Meeting. During the discussion, the class reviewed the different sizes of pizza that were offered at this restaurant. The children decided to measure and cut circles of paper to match the pizza sizes. After Morning Meeting, a small group of children worked on this project.
Mark (5 years, 4 months) helped Barb (teacher) find and trace circular items from around the room that measured the same as the different size pizzas at Aurelio’s Pizza (Figure 4).

Figure 4. Mark and Barb tracing a trash can that is the same size as a pizza listed on the menu.
Tom (3 years, 9 months), Mark, Sarah (4 years, 11 months), Saad (4 years, 1 month), and Rose helped cut out “pizza” circles. When we had all the pizza sizes cut out, we laid them out on the floor in order by size: Lil (6”), Small (10”), Medium (13”), Large (15”), and Fiesta (18”). The children said that it looked like a giant snowman! Later we hung the “pizzas” up in the hallway. (See Figures 5-9.)
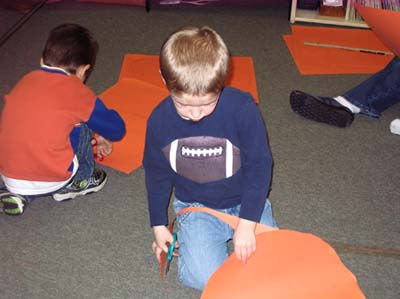
Figure 5. Tracing and cutting circles the same size as various pizzas.
Figure 6. Getting help with the scissors.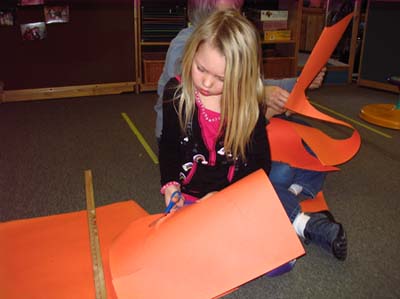
Figure 7. Cutting strategy: making straight cuts from the edge of the paper to the cutting line.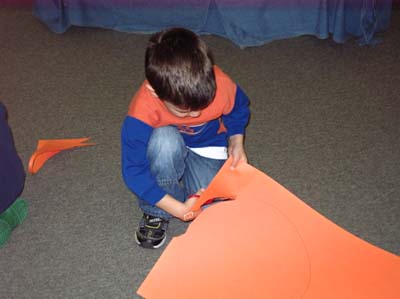
Figure 8. The challenge of turning a large piece of paper while cutting.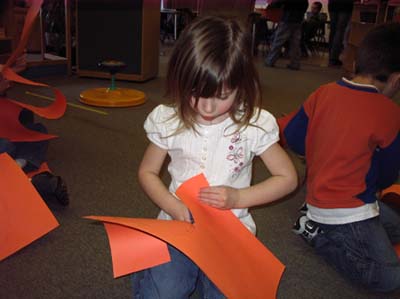
Figure 9. Cutting out circles ranging from 6” to 18”.Dan, “the pizza delivery guy,” visited the child care center. He answered the children’s questions and shared information about working at a pizza restaurant. When Dan was finished answering questions, the children took him to the hallway to show him the pizza circles that they had made the day before (Figure 10).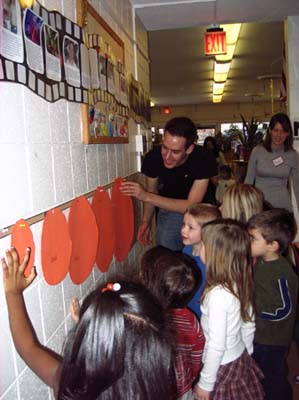
Figure 10. Showing the pizza-sized circles to guest expert Dan.
Planning for Fieldwork
Soon after Dan’s visit, the teachers asked the children, “What do you see in a pizza restaurant?” We felt that it was likely that the children had background knowledge that would help them form questions to ask if we were to visit a pizza restaurant. The children were very excited to discover that they thought of 75 items:
Cups of things to drink:
- lemonade
- soda
- water
- Diet Coke
- juice
- milk
- Pepsi
- Coca Cola
- Sprite
- hot chocolate
Rest rooms:
- toilets
- toilet plunger
- sinks, soap
- hand dryers
- paper towels
- Aprons
- Chef hats
- Chef shirts
- Chef pants
- Pizza bag
- Clipboards
- Receipts
- Pens
- People eating pizza
- Little paper notes
- Pizza delivery cars
- Silverware: knives, forks, spoons
- Markers/crayons
- Money/cash/dollars/coins/ change
- Mustard
- Pizza boxes
- Mushrooms
- Ranch dressing
- Floors
- Ceilings
- French dressing
- Chairs
- Sausage
- Lettuce
- Booths
- Plates
- Plants
- Coloring books
- Fish tanks
- Cash register
- Fans
- Pizza
- Safety lights
- Menus
- Tables
- Other foods
- Napkins
- Ball pits
- Light bulbs
- Walls
- Cooks in the back
- Ovens
- Straws
- Microwaves
- Wait people
- Ketchup
- Stoves
- Books
The children also dictated a thank-you letter for Dan, the pizza delivery person who had visited the child care center. The children helped decorate the letter by drawing pizzas. All the children added their signatures on a separate page (Figures 11-13).
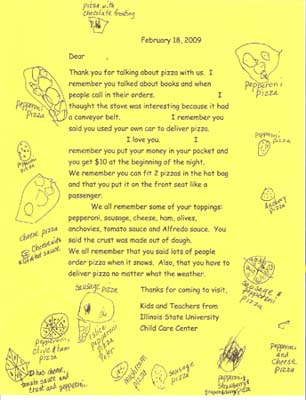
Figure 11. Thank-you letter to Dan, with drawings of pizza. (All names have been removed from this document, which accounts for gaps in the text.) 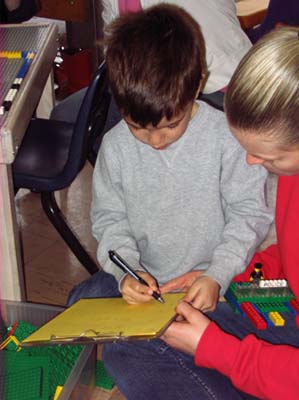
Figure 12. Saad signing the thank-you letter. 
Figure 13. Austin (4 years, 7 months) drawing a pepperoni, strawberry, grapes, and cherry pizza.
Classroom Activities
One morning, Mia (5 years, 2 months) came to the child care center and organized an activity in the art area. She collected small circles of paper and other paper scraps. She then encouraged several other children to make mini-pizzas. She even made an announcement at Morning Meeting about her project. Many children worked on this activity throughout the morning (Figures 14 & 15).
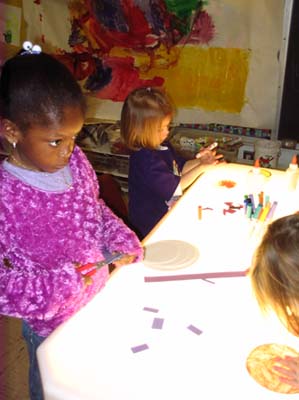
Figure 14. Mia organizing the creation of mini-pizzas from paper scraps.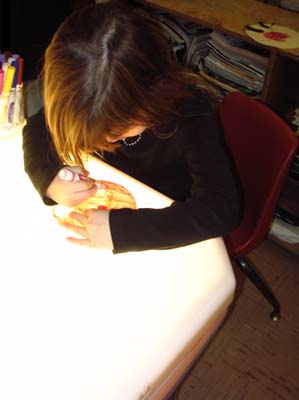
Figure 15. Children making mini-pizzas during the morning.
Andrea’s father, Matthew, brought in some pizza boxes from Jake’s Pizza, where he works. Together the teachers and children looked at the boxes and read through the Jake’s Pizza menu. After Morning Meeting, we added the boxes to our dramatic play area. This addition encouraged pizza-restaurant-themed play that lasted for about 2 weeks. Figures 16 and 17 show Saad, Andrea, Hannah (6 years, 3 months), and Michael (4 years, 6 months) as they took orders and delivered pizza. (Hannah was Andrea's older sister, who was visiting that day.)
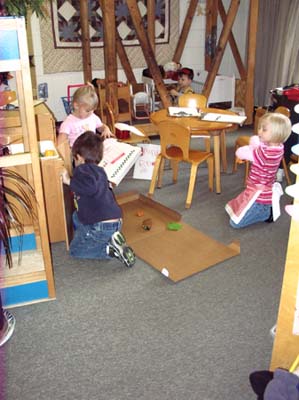
Figure 16. Using pizza boxes in the dramatic play area.
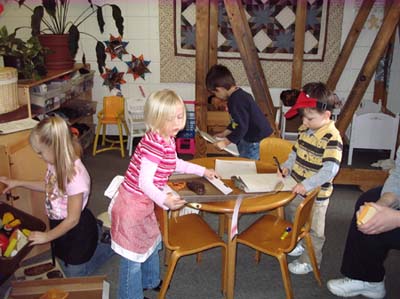
Figure 17. The pizza delivery operation in the dramatic play area.
Pizza-themed play continued in the dramatic play area and found its way into other areas of the classroom. For example, John and Scott (5 years, 3 months) created pizzas using unit blocks. The boys discovered that they could also build one large pizza by connecting the smaller ones they had made (Figures 18 & 19). 
Figure 18. John and Scott building pizzas with unit blocks.
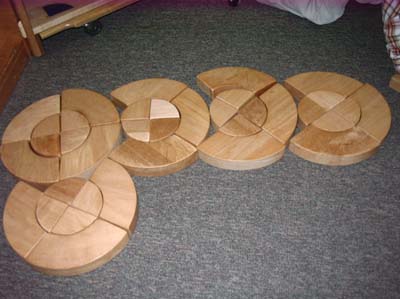
Figure 19. One large unit block pizza made by combining the smaller pieces.
Field Site Visits
The teachers organized fieldwork visits. The field visits were arranged for four small groups to visit either Pizza Hut Express at the Bone Student Center on the ISU campus or the nearby Papa John’s in Normal, the town in which the university is located.
The teachers asked the children to develop a list of questions to share with the Pizza Hut and Papa John’s staff.
- How do you keep the pizza hot?
- Do you have tartar sauce?
- Do you have a uniform?
- Do you wear chef hats?
- Do you decorate the restaurant for holidays?
- Do you have delivery trucks or cars?
- What kind of cheese do you have?
- Do you have soda?
- What kinds of soda?
- Do you get a tip at the end of the day?
- What sizes pizza do you have?
- What toppings do you have?
- Do you have milk?
- What kind of oven do you use?
- Do you have 2 kinds of sauces?
- Do you have chairs to sit on and eat?
- Do you have tables?
- How do you make your dough?
- Do you have a drinking fountain?
- Do you have cheese pizza?
- Do you have books here?
- Do you have a drive-through?
- Do you have sausage?
- Do you have toys to buy?
- How long does it take to make the pizza?
- What kinds of crust do you have?
Small groups of four or five children visited the two pizza restaurants over the course of a week. The restaurant employees were very informative. They answered all the children’s questions and gave them even more information as they explained each section of the restaurant and the pizza-making process. Each day, after completing fieldwork, children in each small group shared the information that they learned with the rest of the class. During each field visit, the teachers took many photos. We printed these photos each day and made them available for the children to look at in our literacy center. Often, we saw groups of children talking about the photos and comparing their individual experiences with those of their friends.
Some of the children were able to make field sketches while visiting the Pizza Hut Express (Figures 20-29). Sue, a Pizza Hut Express employee, showed the children how the restaurant operates (Figure 30). (During their visit, the children received white hats like those worn by employees of the restaurant.)
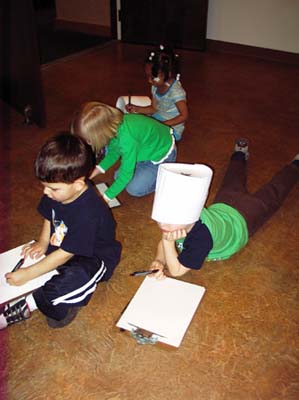
Figure 20. Scott, Rileigh (3 years, 8 months), Andrea (5 years, 3 months), and Tom making field sketches during a site visit.
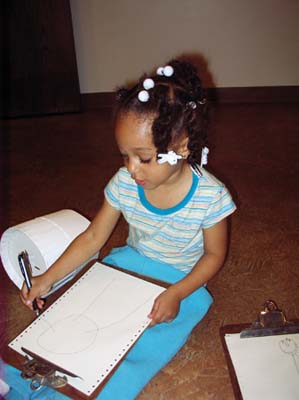
Figure 21. Rileigh sketching Sue, a Pizza Hut employee who showed the group around the restaurant.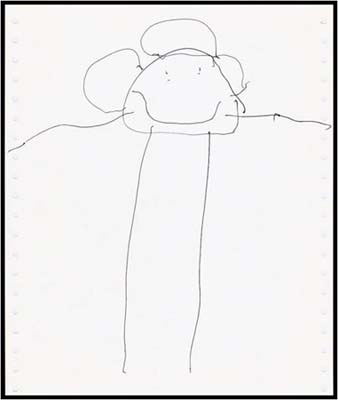
Figure 22. Rileigh’s drawing of Sue.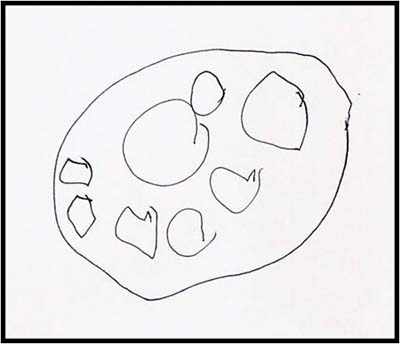
Figure 23. Rileigh’s drawing of a pepperoni pizza.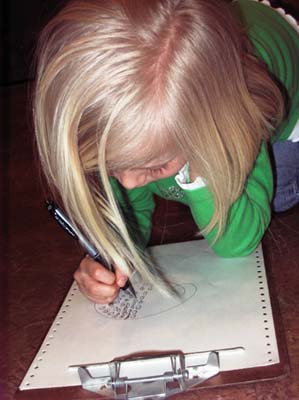
Figure 24. Andrea making a field sketch of a pizza.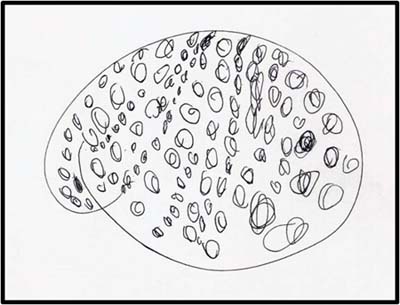
Figure 25. Andrea’s field drawing: a Buffalo chicken pizza.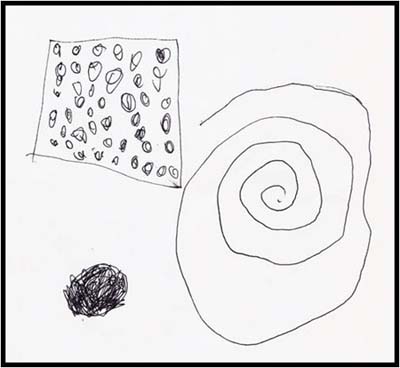
Figure 26. Andrea’s drawing of two pizzas.
Figure 27. Andrea’s representation of the restaurant logo. 
Figure 28. Tom making a field sketch.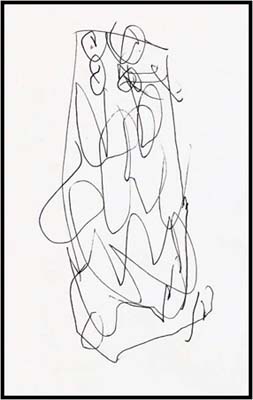
Figure 29. Tom’s drawing of a square pizza.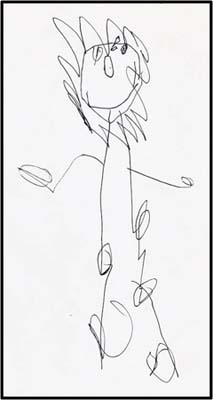
Figure 30. Tom’s sketch of restaurant employee Sue.When the week of field visits ended, the class wrote a thank-you note to the people at the two restaurants who served as experts during the visits. Along with the thank-you notes, the children created a book of memory drawings from their field visits. Below are some examples of the memory drawings and photos taken during our field site visits (Figures 31-34).
Figure 31. Drawing of the rocker knife from Pizza Hut Express, drawn by Luke (4 years, 1 month).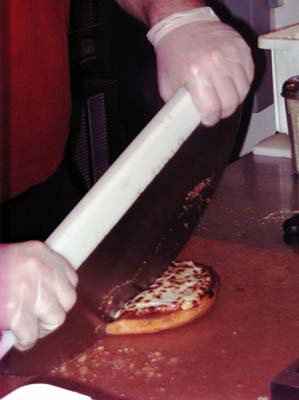
Figure 32. Photo of the rocker knife depicted in Luke’s drawing.
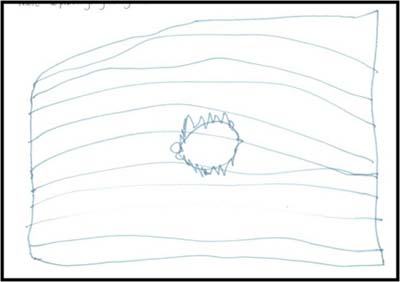
Figure 33. Drawing of pizza going through the oven at Papa John’s by John.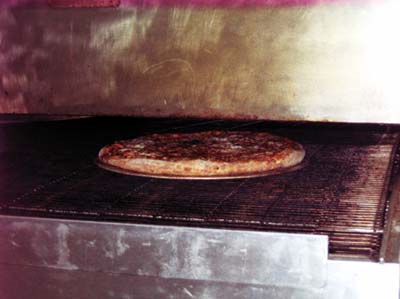
Figure 34. Photo of pizza in the oven depicted in John’s drawing.
Representing Knowledge Gained through Fieldwork
The teachers continued to notice pizza-themed play throughout our classroom. Because of this interest, we felt that the children might be interested in developing a more elaborate stage for their dramatic play. During Morning Meeting, the idea of creating a pizza restaurant in the dramatic play area was proposed by the teachers. The children responded enthusiastically to our suggestion. As the teachers and children began planning this process, pizza play was continuing in other areas of the classroom. For example, Rileigh created a pizza from flexible tube toys (Figure 35).
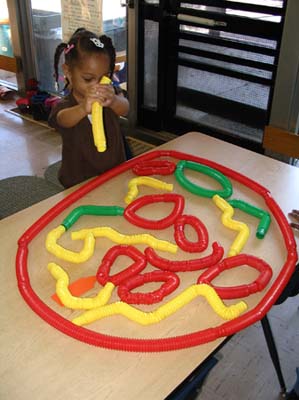
Figure 35. Rileigh’s pepperoni pizza made from stretchy tube toys.
Conveyor Belt Oven Design and Construction
The class all agreed that we should turn our dramatic play area into a pizza restaurant. As part of this plan, some children began work on building our own conveyor belt type oven. Some of the children had been very interested in this kind of oven since visiting Pizza Hut Express. Creating the oven involved drawing plans as well as constructing the parts (Figures 36 & 37).
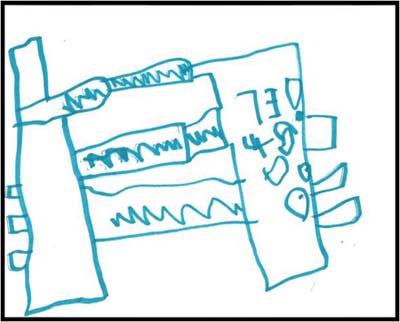
Figure 36. Plan for the pizza oven by Mark. 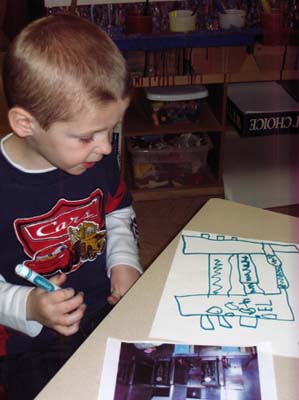
Figure 37. Mark comparing his drawing to a photograph of the oven.
James (4 years, 4 months) drew a plan for the pizza oven that involved using both sides of the paper to show two different views of the oven and that took advantage of the fact that his drawing of the side of the oven partially bled through to the back of the paper. James’ drawing gave the teachers insight into his thinking processes (Figures 38-40).
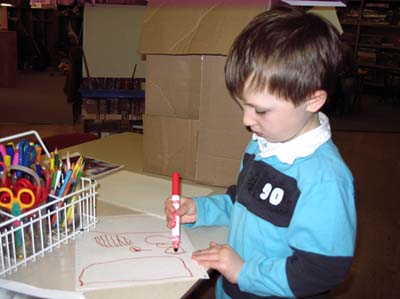
Figure 38. James drawing the conveyer belt type pizza oven.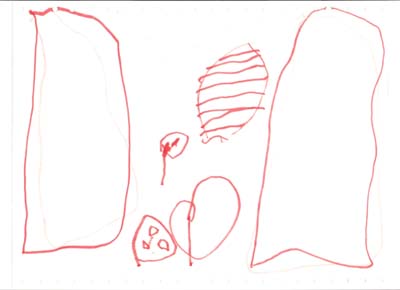
Figure 39. James’ plan for the pizza oven, showing where pizzas go in.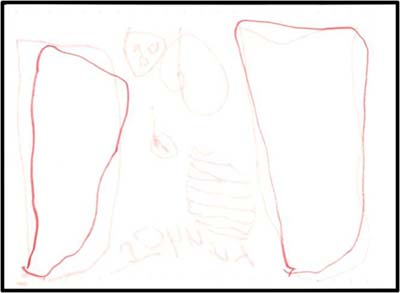
Figure 40. James’ plan for the pizza oven, showing where pizzas come out.
The construction of the conveyor belt pizza oven took 5 days. Many children worked on the various stages. During the construction, we realized that we needed some shoe box lids for the conveyor belt. The teachers left a note on the parent table asking for this item. Many parents brought in shoe boxes to support our construction efforts.
On the box that was selected to serve as the oven, Scott drew the openings for the conveyor belt so that Barb could cut them (Figure 41).
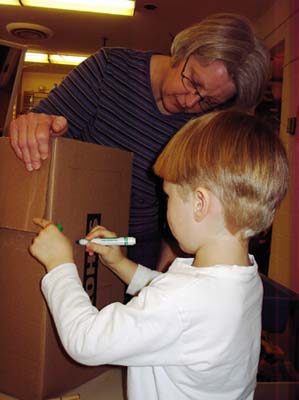
Figure 41. Scott drawing lines so Barb can cut conveyor belt openings in the box.
The children decided to paint both the inside and outside of the oven. During one Morning Meeting, the group discussed colors that might make the inside seem hot. The children suggested that they should use orange, yellow, and red for the inside. Many children wanted to paint the inside of the oven. They had to work as a team in order to avoid painting each other (Figures 42 & 43).
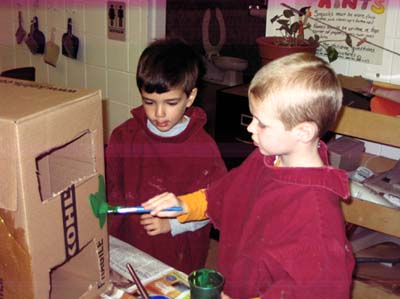
Figure 42. Painting the outside of the oven.
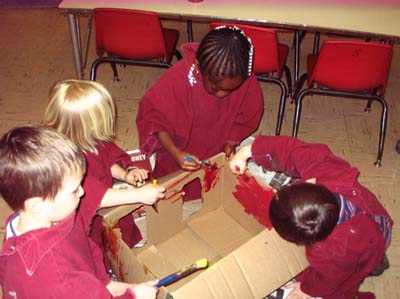
Figure 43. Painting the inside of the oven.
Construction of the conveyor belt involved piecing shoe box lids together and inserting dowel rods on the ends. Mark and Austin measured paper to the correct size, drew cutting lines, and cut the paper to size. They taped multiple sheets of paper together to make a conveyor belt. The paper strip was attached to the dowel rods, which could be turned to make the belt move (Figure 44).
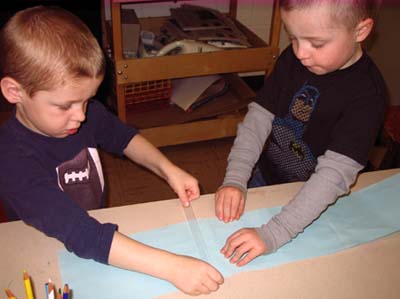
Figure 44. Taping paper together to make a conveyor belt.
Paula (3 years, 7 months) and Mark added knobs to the oven. They made knobs that controlled the temperature and “on/off” knobs. They found brad fasteners to be quite a useful tool! Once the knobs were attached, they wrote labels for each of the knobs. After looking at the photos from our fieldwork, they decided to set the oven temperatures at 470°, 475°, and 480° (Figures 45-47).
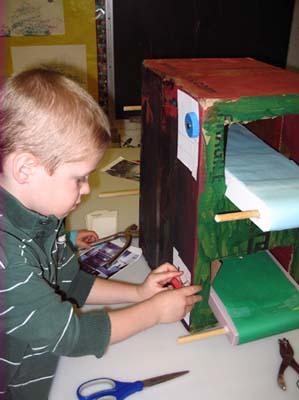
Figure 45. Attaching a knob to the oven.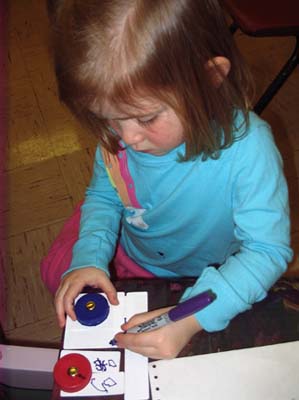
Figure 46. Labeling the knobs.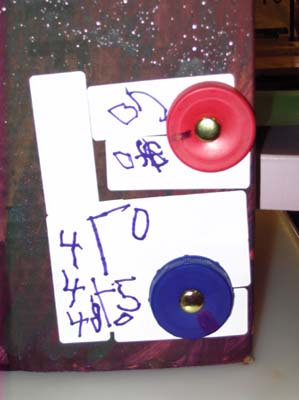
Figure 47. Side view of oven with labels for oven temperatures.
Sign for the Pizza Restaurant
As the restaurant neared completion, the teachers asked the children to suggest possible names for our restaurant. The list included Beedee’s Pizza, Farm & Pizza, Leego’s Pizza, Cheesy Pizza, Tweety’s Pizza, The Best Pizza Place, Mimi’s Pizza, and The Yummiest Pizza. The teachers encouraged the children to evaluate all the possible ideas considering the following points: A good name would make people want to eat at this restaurant, and a good name tells the customers what kind of pizza could be had at this restaurant. We looked at each name on the list, and the group decided that Cheesy Pizza, The Best Pizza Place, and The Yummiest Pizza fit the criteria we had established. Once the list was narrowed down to three choices, the class voted to name our restaurant Cheesy Pizza. Tom and Mark helped create a sign to hang in the restaurant (Figures 48 & 49).
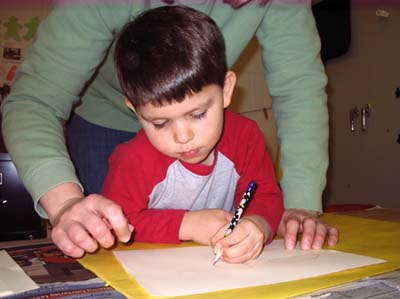
Figure 48. Lettering the sign.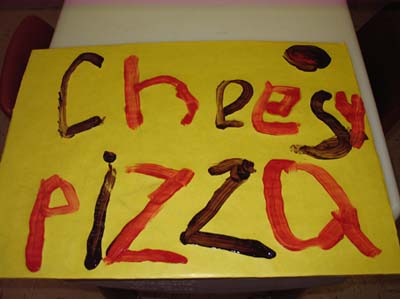
Figure 49. The finished sign: Cheesy Pizza.
Menu for the Pizza Restaurant
A small group of children planned the menu for our restaurant. This group reviewed the menus from both pizza restaurants that we had visited for fieldwork and made the decisions about what to serve at Cheesy Pizza. Once the menu was complete, the teachers asked the children to draw pictures of each menu item. A teacher used their drawings to create a one-page menu. We made multiple copies of the menu and had them laminated. These menus were put in the dramatic play restaurant. Bruce (4 years, 10 months) drew breadsticks for the menu. Scott drew a fresh tomato as an ingredient choice on the menu (Figures 50-53).
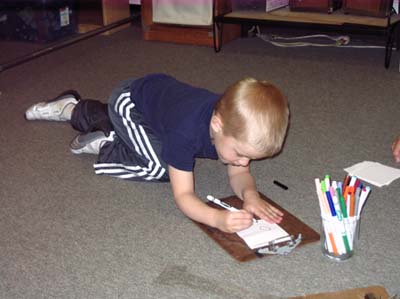
Figure 50. Bruce drawing breadsticks for the menu.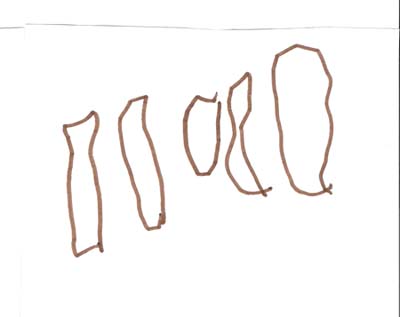
Figure 51. Drawings of breadsticks.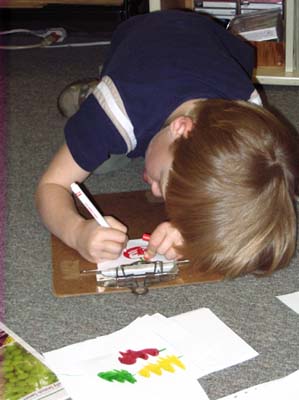
Figure 52. Scott drawing a fresh tomato for the menu.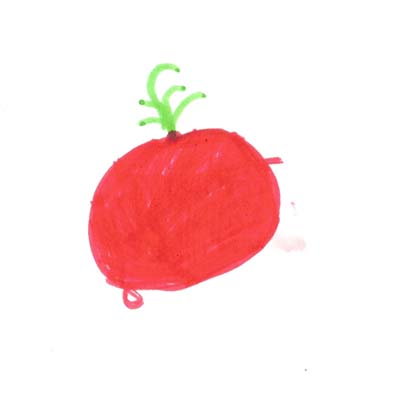
Figure 53. Scott’s finished tomato.
View the Cheesy Pizza menu (PDF).
Making Pizzas, Breadsticks, and Salads
Work began on creating 3-dimensional representations of the food that would be served in the restaurant. Many children participated in the creation of pizzas and breadsticks using Model Magic. Once the model food was dry, the children painted the breadsticks and colored the pizzas using markers. The salads were created using small plastic bowls, glue, and construction paper scraps (Figures 54-60).
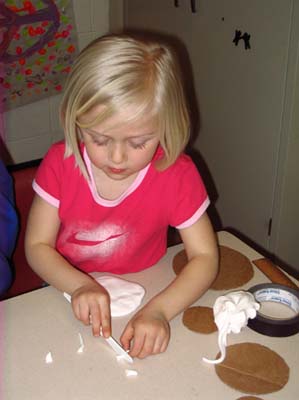
Figure 54. Creating food with Model Magic.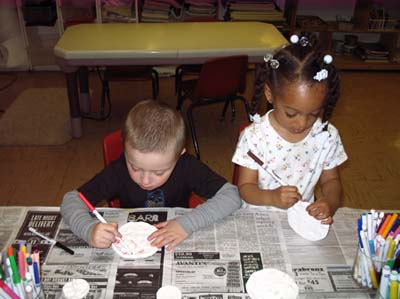
Figure 55. Adding color to the dried “pizzas.”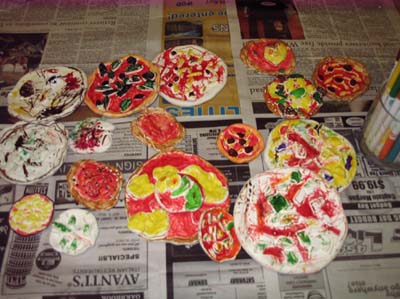
Figure 56. Pizza assortment.
Figure 57. Shaping and cutting the Model Magic.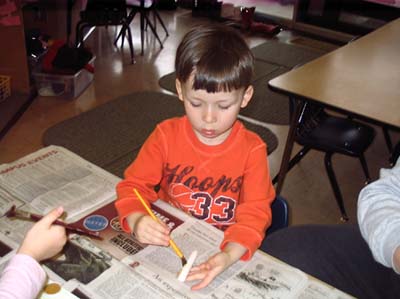
Figure 58. Painting a “breadstick.”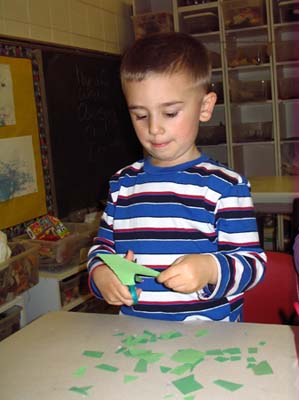
Figure 59. Preparing the “salad.”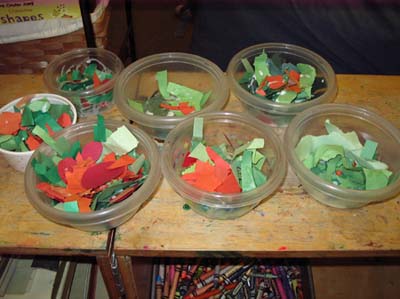
Figure 60. Completed “salads.”
Creating a Fish Tank for the Restaurant
At Morning Meeting one day, the teachers and children were discussing the next step in creating the Cheesy Pizza restaurant. The children reminded the teachers that they wanted a fish tank in their restaurant and thought we should move our fish tank to the dramatic play area. When the teachers said that wasn’t possible because the fish tank was too heavy, Mark said that his sister had once made him a pretend fish tank out of a box. The children liked this idea so, after Morning Meeting, Tom, Rose, and Pam, one of the teachers, took on the task of creating a fish tank.
They evaluated using a flat box, a shoe box, or an empty glass aquarium. Rose thought the glass aquarium might break if it fell over. She said that wasn’t a good choice. The flat box would need to be hung on the wall. Tom wanted to put the fish tank on a shelf in the restaurant. They decided that the shoe box would be the best choice (Figures 61 & 62).
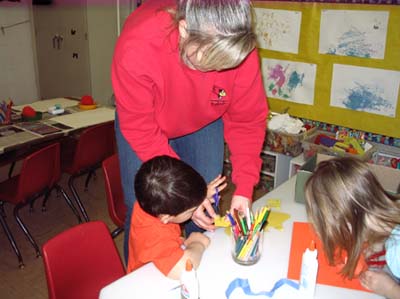
Figure 61. Cutting out components of the “Cheesy Pizza” fish tank.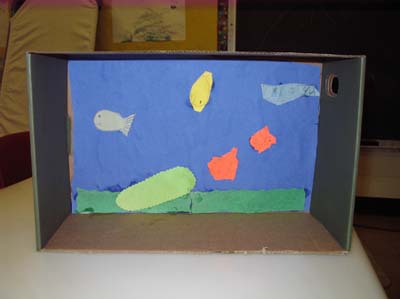
Figure 62. The completed fish tank.
Rearranging the Dramatic Play Area
Saad, Rileigh, Paula, John, and Scott worked with Lisa (teacher) to create the Cheesy Pizza restaurant in the dramatic play area in the classroom. The children looked in cabinets in the dramatic play area and discussed which items would be needed for the restaurant (Figure 63).
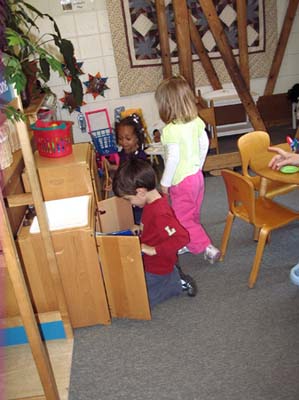
Figure 63. Searching the cabinets for items for the restaurant.
The children packed up all items that they thought the restaurant would not need in baskets. They helped move the baskets to storage areas.
Rearranging the furniture came next. The children seemed to have a plan in mind and were busy for a very long time (Figures 64 & 65).
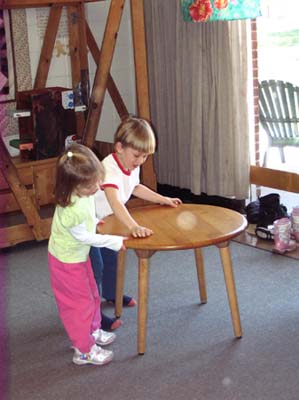
Figure 64. Moving a table. (The pizza oven is set up in the background.)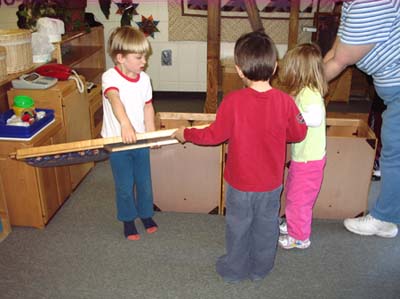
Figure 65. Setting up the restaurant counter.
In the end, the restaurant included a kitchen area with the pizza oven, a counter for ordering, a storage area, and an eating area with tables and chairs (Figures 66-69). The kitchen section included the children’s pizza oven and a bin of Model Magic pizzas. The counter area included a phone, cash register, calculators, and notepads for writing orders. The storage shelf held the uniforms, salads, cups, and pizza boxes. It would be rearranged many times as the children added more items to their restaurant. The eating area was at the front of the restaurant. The fish tank was placed on a shelf in the eating area. 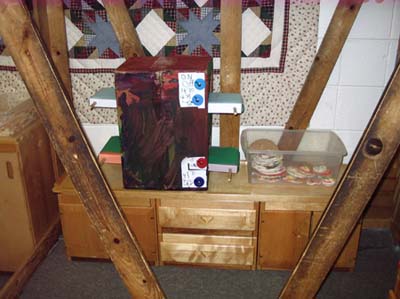
Figure 66. Kitchen section of the Cheesy Pizza restaurant, featuring pizza oven and bin of pizzas.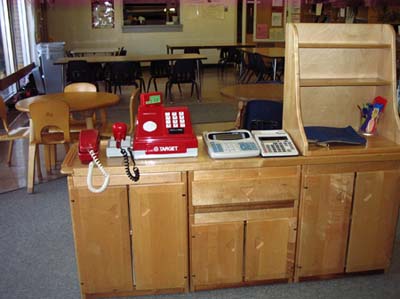
Figure 67. The restaurant counter area.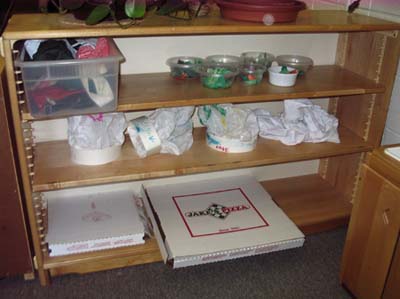
Figure 68. Storage shelf for uniforms, salads, pizza boxes, and more.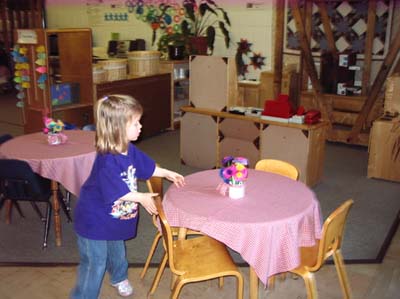
Figure 69. Restaurant eating area.
Creating Cups and Flower Arrangements for the Tables
Mark, Rileigh, Andrea, Rose, and Scott helped label and decorate cups for use in the restaurant. They wrote “Cheesy Pizza” and drew pictures on the cups (Figures 70 & 71).
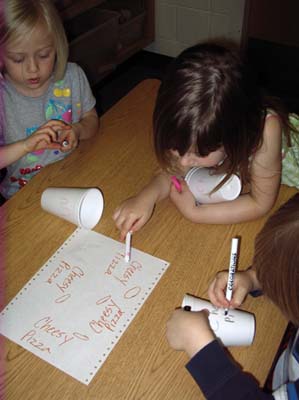
Figure 70. Rose carefully studying the sample text as she copy writes “Cheesy Pizza” on her cup.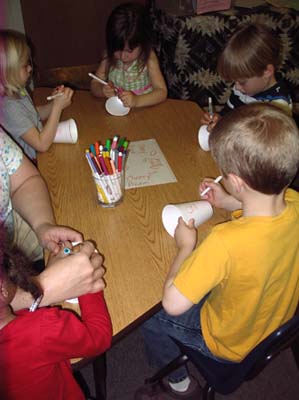
Figure 71. Decorating drinking cups for the Cheesy Pizza Restaurant.
Rose, Luke, Andrea, and Paula made tissue paper flowers to create centerpieces for the Cheesy Pizza restaurant tables (Figures 72 & 73).
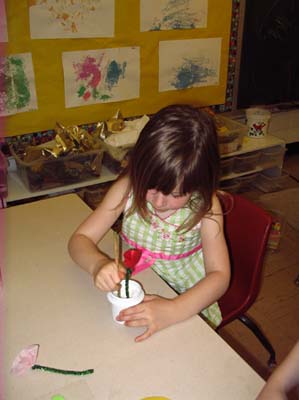
Figure 72. Using a dowel to poke a hole to hold a flower stem.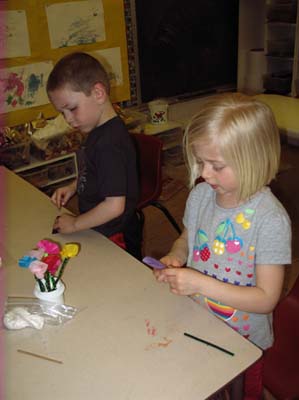
Figure 73. Working together on centerpieces.
Creating a Uniform Chart
The children had shown great interest in the uniform chart at Papa John’s. This chart showed the proper uniform to wear as well as unacceptable dress for employees. Using photos of Mia and Rileigh posing in “Better” and “Better Not” uniform attire, Rose and Paula helped create a Cheesy Pizza version of the uniform chart (Figures 74-76).
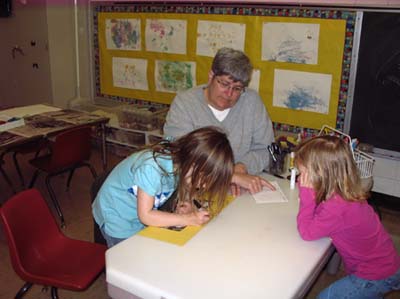
Figure 74. Lettering the uniform chart.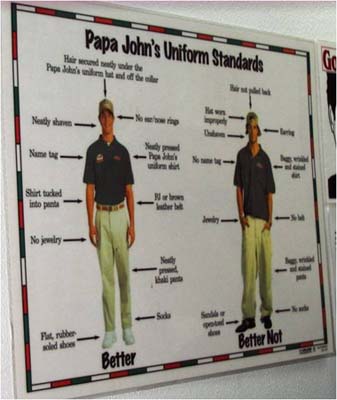
Figure 75. The original poster showing the restaurant workers’ dress code.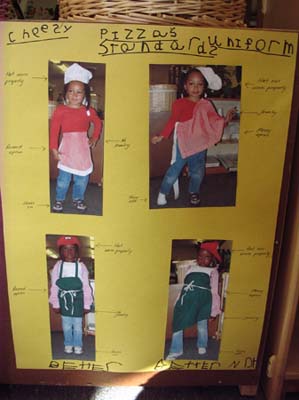
Figure 76. The children’s “Uniform Standards” chart, completed with some adult help.
Cheesy Pizza Restaurant Dramatic Play
Once the children began using the restaurant for play, they thought of other items that they wanted to create or add to the area. They realized that they needed trays to serve the food to customers. They also asked for cloths to use to clean the tables. The children discovered that customers needed money to buy food. The teachers created a “bank” in a file box located on the big book cart next to the dramatic play area, using pretend money that we already had in our dramatic play kits.
Some of the “customers” asked for salad dressing, which the children had not thought to create. Michael stuffed yarn into salad dispenser bottles to create French and Ranch dressing for the salads in the restaurant (Figure 77). The children also asked the teachers for small plastic cups to use for dipping sauce for the breadsticks. 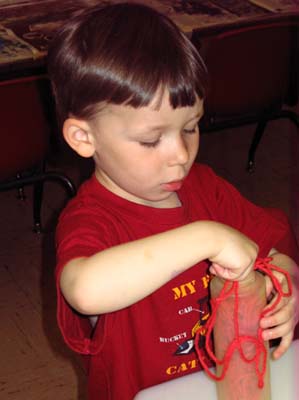
Figure 77. Preparing a “salad dressing” bottle.
The children happily served each other, teachers, parents, and all the visitors to the classroom who came to see the Cheesy Pizza restaurant (Figures 78-82).
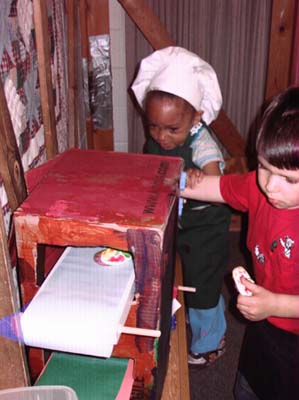
Figure 78. Cooks using the conveyer belt oven.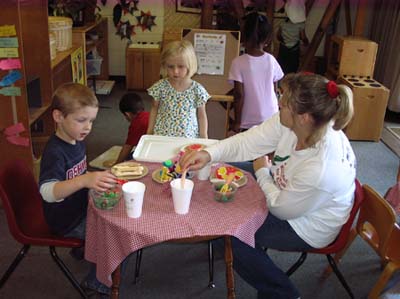
Figure 79. Serving the guests at Cheesy Pizza.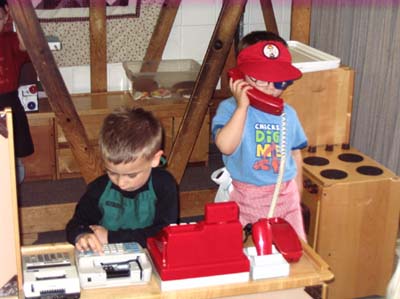
Figure 80. Taking phone orders.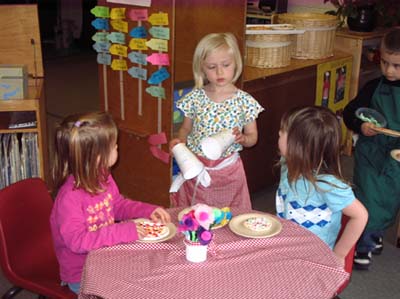
Figure 81. Cheesy Pizza wait staff and customers.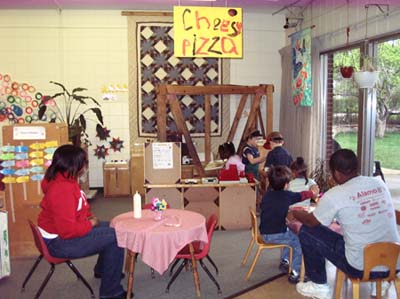
Figure 82. Adult customers at Cheesy Pizza.
The Cheesy Pizza continued to be a popular spot in the classroom. Because of its popularity, Luke decided that the Choice Time Board sign should read “Cheesy Pizza” instead of Dramatic Play. He took on the task of creating a sign. He wrote the name on a piece of yellow paper, which he attached to the sign. He then asked Barb to find a picture of a pizza for him on the teacher’s computer. She printed out one of the drawings made earlier in the project. He cut out the pizza image and attached it to his sign. He punched holes in the sign and hung it on the Choice Time Board (Figures 83 & 84).
Figure 83. Luke, who decided to make a special Choice Time Board sign. 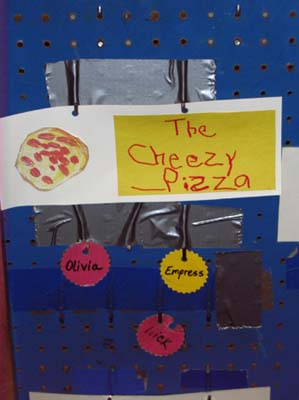
Figure 84. Luke’s sign, created for the Choice Time Board.
Reflections on Phase 2
Using our past experiences with fieldwork, we asked the field site experts for visits on two days, which allowed us to divide our class into smaller groups. We felt that this strategy allowed the children to get a closer look at all the equipment and have a more personal relationship with the field expert. The teachers felt that they saw a difference in the amount of knowledge retention and the richness of discussions back in the classroom because of the quality of the field site visits.
As Phase 2 progressed, the teachers were pleased to see all of the children involved in the various representational activities that were taking place in the classroom. As we wrote this article, we realized that every child in our class was involved in some way in Phase 2! In past projects, usually a core group of children has “driven” the project, while the other children may float in and out of representational activities. This project was unique in that different children took the lead in organizing and planning the various representational activities that occurred. Many of the decisions about what to do or how to represent information or ideas were made at Morning Meetings with the whole group discussing, making suggestions, and learning from each other. The teachers observed a large amount of cooperative work, with children of different ages working together. The oldest children were not always the leaders, as is often seen in a mixed-age classroom.
The teachers also were pleasantly surprised by the amount of new vocabulary that we heard as the project developed. The dramatic play that evolved as part of this project was quite rich in terms of social interaction and the verbal exchanges that occurred. As the children worked to represent their knowledge and create items for the pizza restaurant, there were many opportunities for problem solving to occur. After the Cheesy Pizza opened for “business,” the children again engaged in problem solving and added a number of items that enriched their play.
Phase 3
Phase 3 often includes a culminating event, collaborative evaluation, further activities related to the topic, discussions around planning a culminating event, setting up displays for parents and other pertinent people to view, and soliciting comments from parents.
Many of the children invited their parents to play with them in the Cheesy Pizza restaurant at morning drop-off or evening pick-up. The teachers felt that many of the families had enjoyed interacting with their children in the restaurant, so an open house type culminating event wasn’t necessary.
Instead, the children dictated text for a brochure that described the creation of the Cheesy Pizza restaurant. The teachers planned a family event that included serving dinner of pizza ordered from Papa John’s and sharing the brochure that the children had created. The family pizza night took place in our classroom (Figure 85).

Figure 85. Children and family members at the pizza party.
Sixty-eight people attended the event with 100% family participation! Along with the children, parents, siblings, a few teacher aides, some grandparents, cousins, and aunts also attended the celebration.
View the Cheesy Pizza brochure (PDF).
Reflections on Phase 3
The teachers were thrilled with the attendance numbers for this event. We had never had 100% family participation in a culminating event for a project. Finding seating for everyone was a challenge, but in the end, it all worked out! The families had a chance to visit, and the teachers felt that everyone enjoyed celebrating with the children.
At the end of each project, the teachers review the Illinois Early Learning Standards and post the benchmarks that were met over the course of the project. We add this list at the end of our project documentation so parents can see how valuable project work is for young children. We found that 73 out of 105 benchmarks were addressed by activities that occurred over the course of the Pizza Project (see the Appendix).
Several months after the culminating activity, the teachers solicited comments from families about the Pizza Project. A number of parents responded. Rileigh’s mother recalled that her daughter “loved the pizza project you guys worked so hard on. She felt independent and expressed to me how much more she knew about the pizza process than I did. I really liked how she was taught the complete process from making to selling to serving the pizza. The creativity used was remarkable, and I am very appreciative for the efforts put forth. It is fascinating how something that seems to be so simple can play such a huge part in a child’s life and supply so many lessons to learn.”
“Ordering a pizza for our family has never been the same since,” another parent commented, adding, “Our son, Mark, became very interested in the various sizes of pizzas and how they are measured. He still talks about a "Fiesta Pizza" from a particular pizza establishment being 16 inches and compares the size pizza we are eating to a "Fiesta Pizza." Whenever we visit a pizza restaurant, he analyzes the systems for serving vs. pick-up of pizza, payment, and ordering.”
One parent reflected that the project had led to a change in home life. “Our son, Tom, absolutely loved the Pizza Project. He especially loved getting to see how pizza was made and then enjoyed being able to replicate the process using the "pizza parlor" that was set up at the ISU Child Care. He showed more interest in how food was prepared after that experience and often tries to help out in the kitchen.”
"Saad really enjoyed the Pizza Project and built friendships in the process,” another parent remarked. “The teachers shared daily pictures of the children building the pizza restaurant. Saad helped to collect items for the front counter and even helped carry the tables! I was amazed that a group of 3-, 4- and 5-year-olds could cooperate and perform major tasks on their own initiative. The Pizza Project was another great example of how the ISU Child Care Center teachers nurture children's minds by providing opportunities for them to work as a team and solve problems together."
Author Information
Barb Gallick is a team teacher at Illinois State University Child Care Center. She co-teaches with two other teachers in a mixed-age classroom serving children ages 3 to 6 years old. Barb has a B.S. in elementary education with a minor in early childhood education and a M.S. in curriculum and instruction with an emphasis in early childhood education. Barb continues to learn about the Project Approach. She has been a member of the organizing team that coordinates the Illinois Project Support Group and is a member of Project Approach Teacher Education Network.
Barb Gallick
Illinois State University
Campus Box 5060-Child Care Center
Normal, IL 61790-5060
Email: bagalli@ilstu.edu
Lisa Lee is a team teacher at Illinois State University Child Care Center. She co-teaches with two other teachers in a mixed-age classroom serving children ages 3 to 6 years old. Lisa has a B.S. in physical education with many postgraduate hours focusing on early childhood education. She has conducted a variety of workshops and training sessions related to the Project Approach.
Lisa Lee
Illinois State University
Campus Box 5060-Child Care Center
Normal, IL 61790-5060
Email: ljlee@ilstu.edu
Appendix
Early Learning Benchmarks Addressed by the Pizza Project
Over the course of the Pizza Project, the following Illinois Early Learning Standard Benchmarks were met. This project included activities that addressed 73 out of the 105 benchmarks: 13 of 21 Language Arts benchmarks, 17 of 20 Mathematics benchmarks, 8 of 15 Science benchmarks, 8 of 10 Social Science benchmarks, 7 of 14 Physical Development and Health benchmarks, 6 of 10 Fine Arts benchmarks, both Foreign Language benchmarks, and 12 of 13 Social/Emotional Development benchmarks.
Language Arts
1.A.ECa Understand that pictures and symbols have meaning and that print carries a message.
1.A.ECc Identify labels and signs in the environment.
1.A.ECd Identify some letters, including those in own name.
1.A.ECe Make some letter-sound matches.
2.A.EC Understand that different text forms, such as magazines, notes, lists, letters, and story books, are used for different purposes.
3.A.EC Use scribbles, approximations of letters, or known letters to represent written language.
3.B.EC Dictate stories and experiences.
3.C.EC Use drawing and writing skills to convey meaning and information.
4.A.EC Listen with understanding and respond to directions and conversations.
4.B.EC Communicate needs, ideas, and thoughts.
5.A.EC Seek answers to questions through active exploration.
5.B.EC Relate prior knowledge to new information.
5.C.EC Communicate information with others.
Mathematics
6.A.ECa Use concepts that include number recognition, counting, and one-to-one correspondence.
6.A.ECb Count with understanding and recognize "how many" in sets of objects.
6.B.EC Solve simple mathematical problems.
6.C.ECa Explore quantity and number.
6.C.ECb Connect numbers to quantities they represent using physical models and representations.
6.D.EC Make comparisons of quantities.
7.A.ECa Demonstrate a beginning understanding of measurement using non-standard units and measurement words.
7.A.ECb Construct a sense of time through participation in daily activities.
7.B.EC Show understanding of and use comparative words.
7.C.EC Incorporate estimating and measuring activities into play.
8.A.EC Sort and classify objects by a variety of properties.
8.B.ECb Begin to order objects in series or rows.
8.C.EC Participate in situations that involve addition and subtraction using manipulatives.
9.A.EC Recognize geometric shapes and structures in the environment.
9.B.EC Find and name locations with simple words, such as “near.”
10.A.ECa Represent data using concrete objects, pictures, and graphs.
10.B.EC Gather data about themselves and their surroundings.
Science
11.A.ECa Use senses to explore and observe materials and natural phenomena.
11.A.ECb Collect, describe, and record information.
11.B.ECb Become familiar with the use of devices incorporating technology.
12.C.EC Make comparisons among objects that have been observed.
12.E.ECb Participate in recycling in their environment.
13.A.EC Begin to understand basic safety practices.
13.B.ECa Express wonder and ask questions about their world.
13.B.ECb Begin to be aware of technology and how it affects their lives.
Social Science
14.A.EC Recognize the reasons for rules.
14.C.EC Participate in voting as a way of making choices.
14.D.EC Develop an awareness of roles of leaders in their environment.
15.A.EC Identify community workers and the services they provide.
15.D.EC Begin to understand the use of trade to obtain goods and services.
16.A.EC Recall information about the immediate past.
17.A.ECa Locate objects and places in familiar environments.
17.A.ECb Express beginning geographic thinking.
Physical Development and Health
19.A.ECa Engage in active play using gross motor skills.
19.A.ECb Engage in active play using fine motor skills.
19.B.EC Coordinate movements to perform complex tasks.
22.A.EC Participate in simple practices that promote healthy living and prevent illness.
24.A.ECa Use appropriate communication skills when expressing needs, wants, and feelings.
24.A.ECb Use socially acceptable ways to resolve conflict.
24.C.EC Participate in activities to learn to avoid dangerous situations.
Fine Arts
25.A.ECb Drama: Investigate the elements of drama.
25.A.ECd Visual Arts: Investigate the elements of visual arts.
25.B.EC Describe or respond to their own creative work or the creative work of others.
26.A.ECb Drama: Participate in drama activities.
26.A.ECd Visual Arts: Participate in the visual arts.
26.B.EC Use creative arts as an avenue for self-expression.
Foreign Language
28.A.EC Maintain the native language for use in a variety of purposes.
30.A.EC Use and maintain the native language in order to build upon and develop transferable language and literacy skills.
Social/Emotional Development
31.A.ECb Exhibit eagerness and curiosity as a learner.
31.A.ECc Exhibit persistence and creativity in seeking solutions to problems.
31.A.ECd Show some initiative and independence in actions.
31.A.ECe Use appropriate communication skills when expressing needs, wants, and feelings.
32.A.ECa Begin to understand and follow rules.
32.A.ECb Manage transitions and begin to adapt to change in routines.
32.A.ECc Show empathy and caring for others.
32.A.ECd Use the classroom environment purposefully and respectfully.
32.B.ECa Engage in cooperative group play.
32.B.ECb Begin to share materials and experiences and take turns.
32.B.ECc Respect the rights of self and others.
32.B.ECd Develop relationships with children and adults.