Volume 10 Number 2
©The Author(s) 2008
Building “Bob”: A Project Exploring the Human Body at Western Illinois University Preschool Center
Abstract
When the children at Western Illinois University Preschool Center embarked on a study of human bodies, they decided to build a life-size model of a body, organ by organ from the inside out, to represent some of the things they were learning. This article describes the building of "Bob," the human body model, highlighting the children's problem solving at various points in the construction process. The article also explains other activities that the class engaged in during the three phases of project work. The project culminated in the creation of a classroom book, written and illustrated by all of the children, which could be shared with families and visitors to the classroom.
School, Classroom, and Student Background Information
The Western Illinois University Preschool Center is located on the Macomb, Illinois, campus. The center is a laboratory site for many departments on campus, such as education, kinesiology, sociology, social work, music, and dance. The children's parents are university students, faculty, and staff. The classroom that is the focus of this report was a mixed-age classroom with 22 children ages 3-5 years. Fifteen of the children were boys, and 7 were girls. As the Lead Teacher, I conducted most of the project work with the children. An assistant teacher and several student workers also participated. This project on the human body was the group's second experience with project work.
Phase 1: Beginning the Project
During Morning Meeting, the daily whole group gathering to discuss the day's activities, I shared a story with the children about a trip to the doctor over spring break. During previous weeks, the children had been playing doctor and asking many questions about their bodies. The children became excited about sharing their stories of doctor visits, blood, and digestion. Several children showed cuts that they had gotten over break, as well as the different bandages. The children seemed to be all talking at the same time, eager to share experiences with everyone. I asked whether they would like to investigate the topic of the human body further. Most of the children agreed with enthusiasm.
The following morning, I read aloud from the book What's Inside? My Body by Angela Royston and Richard Manning. The children were very interested to see the cross-section drawings of the inside of a human body. They also discovered that the brain communicates with all the parts of the body to make things work.
As a whole group, the children explored the muscles that they could see moving when they bent their arms. They also found that they could see some of their blood vessels through their skin. The class also explored bones through touch. They felt their skulls, collarbones, wrist bones, shinbones, ribs, spines, and the bones in their hands. They discovered which parts of the skeleton are visible: the teeth!
After Morning Meeting, some of the children decided to sketch body parts that they recalled from the readings.
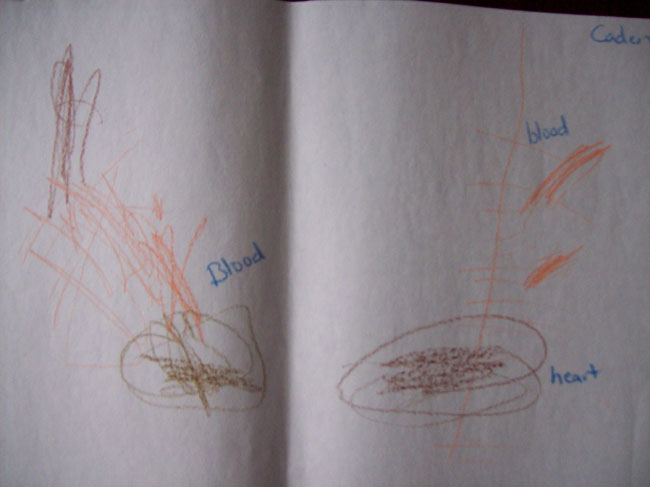
Figure 1. Child’s drawing of the circulatory system, based on books read aloud. 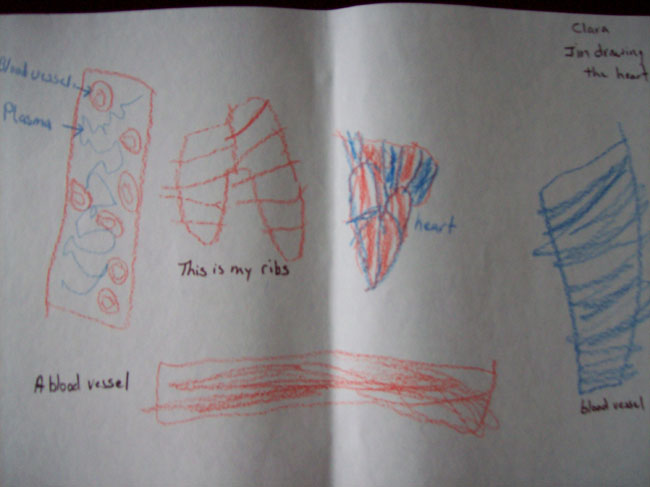
Figure 2. A drawing of part of the circulatory system. The child commented, “I’m drawing the heart.” 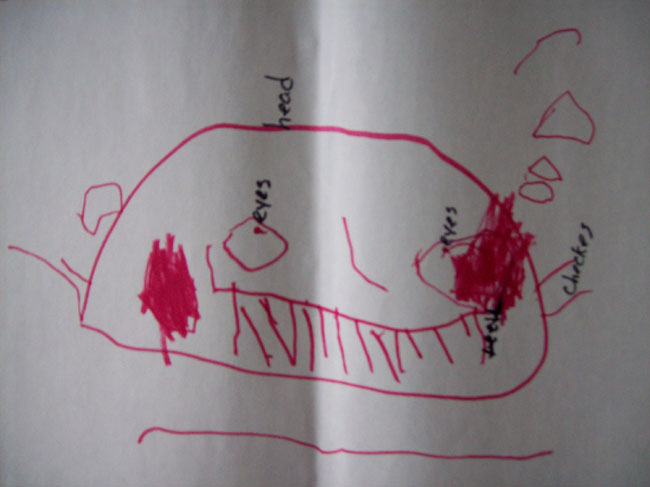
Figure 3. A child’s drawing of a head and face.
Class Survey
During one Morning Meeting, I took a survey of the children's favorite body parts:
| Child | Body Part |
|---|---|
| Aera (3.7 years) | head |
| Colton (4.4 years) | hands |
| Carol (5.2 years) | hands |
| Corey (5.5 years) | skeleton |
| Dario (3.10 years) | poop |
| Declan (3.4 years) | head |
| Erek (5.3 years) | skeleton & brain |
| Gordon (4.2 years) | bones |
| Jared (2.10 years) | fingers |
| Jason (5.6 years) | skeleton & brain |
| Mel (3.7 years) | legs |
| Martin (3.11 years) | blood |
| Nick (2.11 years) | legs |
| Riann (3.2 years) | blood |
| Simone (3.6 years) | blood |
| Sam (3.11 years) | skeleton |
| Selena (3.4 years) | tummy |
| Zeke (3.7 years) | blood |
Several days after sharing many stories about their bodies, the class generated an idea web during Morning Meeting:
The children formulated questions prompted by a question Zeke posed at lunch the previous day, "Why do we have fingernails?" The questions were:
- Why do we eat healthy food? (Colton & Zeke)
- Why do we go poop? (Dario)
- Why do we have toenails? (Jason)
- Why do we have eyes? (Mary, 5.1 years)
- Why do we have a mouth? (Gordon)
- Why do we have a tongue? (Selena)
- Why are our bones white? (Carol)
- Why do we have teeth? (Aera)
- Why do we have hands? (Simone)
Phase 2: Developing the Human Body Project
Using a Variety of Information Sources
I knew that the schedules of the program's student workers would make site visits almost impossible during this project, so the investigation of the human body would have to depend on what could be done in the classroom. The children were able to refer to their own bodies as the main basis for their investigation. I also provided several models of internal organs and a lifelike skeleton puzzle for the class to explore. The models and the puzzle came from the university's education library, which is located in the same building as the school.
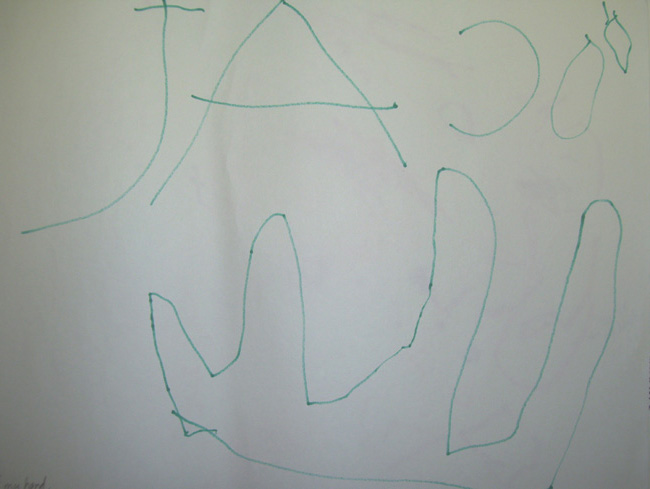
Figure 4. Sketch of “half of my hand” by Jason (5.6 years). 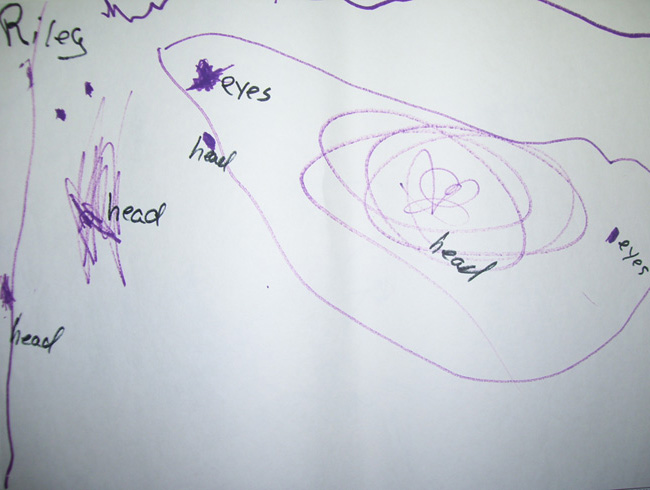
Figure 5. Observational drawing of head with eyes by Riann (3.2 years). 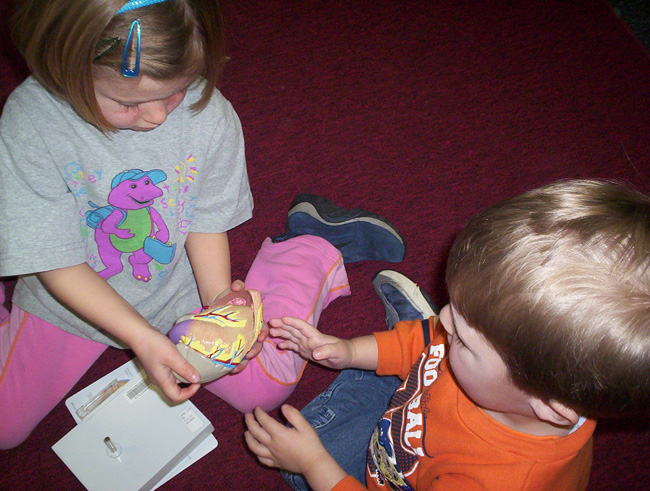
Figure 6. Children exploring a model of the heart. 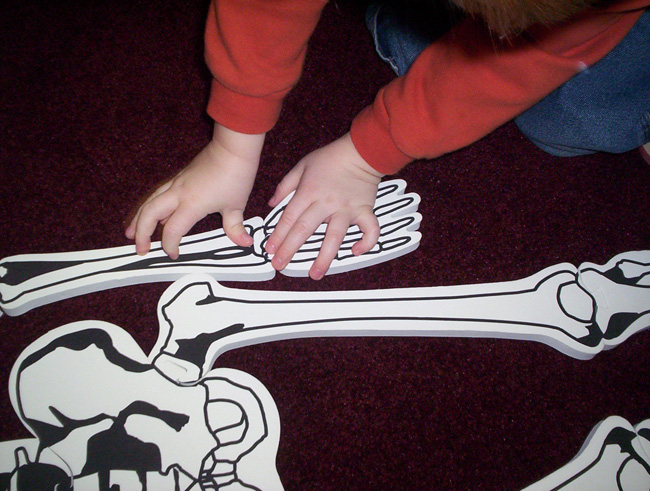
Figure 7. Constructing a skeleton puzzle.
Classroom Visitor
One of the university students who worked in the classroom shared her extensive knowledge of the brain with the class. Her daughter was born with a large pocket of water in the center of her brain. She shared several X-rays of her daughter's brain, pointing out the different areas and shapes. The water pocket left a black area in the X-ray. She explained that it was very difficult for her daughter to learn how to walk and use her arms. She had to use the front part of her brain, instead of the motor section, which is normally used, to learn to walk.
The children were fascinated by the X-ray photos, and many of them decided to duplicate the images on paper. Mary (5.1 years) sketched brains from many different angles, just as they were in the full X-ray. Carol made three sketches with marker on construction paper. The first was a sketch of the image on an X-ray brought in by the student worker, with the pocket of water in the middle. Another sketch showed the eye sockets and eyes, which could be seen in one of the X-rays. A third sketch was of an X-ray of the top of the brain, showing both hemispheres.
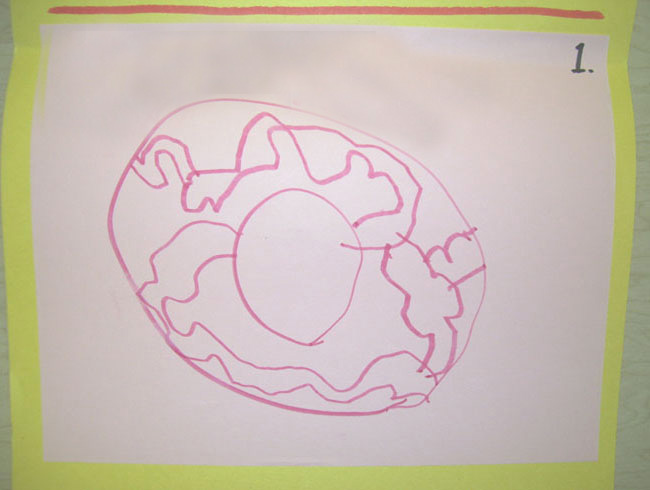
Figure 8: Sketch of the X-ray brought by a visitor, with the pocket of water in the middle. 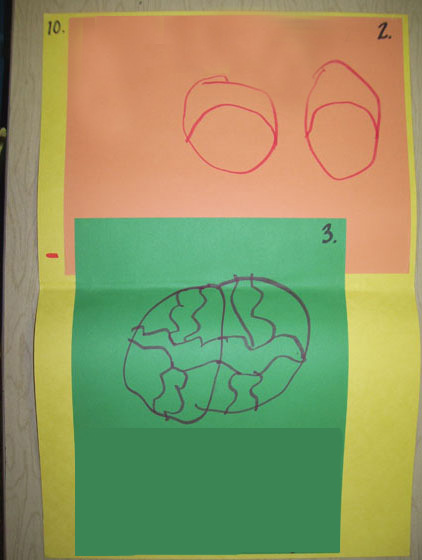
Figure 9: On orange paper, a sketch of eye sockets and eyes, as seen in one of the X-rays brought in by a student worker. On green paper, a sketch of the top of the brain showing both hemispheres.
Expressing Interest in Making Models
Early in the project, it became evident that the children were interested in using 3-dimensional models to represent the findings of their investigation of the human body. They seemed especially fascinated with the internal workings of the body. For example, there was much discussion of the stomach at Morning Meetings.
Constructing a Stomach
A group of children decided they would be interested in simulating a stomach and how it works, but were uncertain how to begin. First they discussed materials: What could hold food and water? Paper was ruled out because it would not hold food and water. The children already knew that in the stomach the food is not dry and that when people drink water it also goes to the stomach. Finally, Mary suggested using a bottle. The children and I found a clear container under the sink that could serve as a stomach.
Next the children and I discussed what happened to food before it got to the stomach. Jason said food needed to be chewed so that it could be swallowed. The group had access to pretzels and carrots, which happened to be left over from snack, and decided to put those into the stomach. The pretzels could be easily broken up, but the problem arose of how to break up the carrots (without really chewing them). Several children suggested knives, but I reminded them that no sharp knives were available in the classroom. After some debate, they agreed that scissors could be used to cut the carrots.
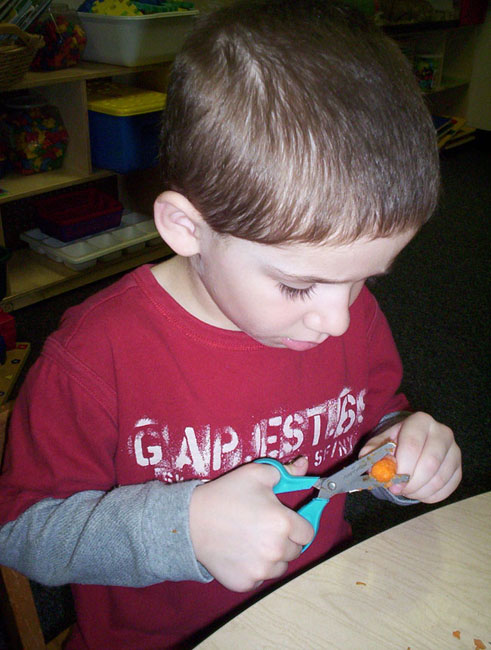
Figure 10. Cutting carrots into chunks. 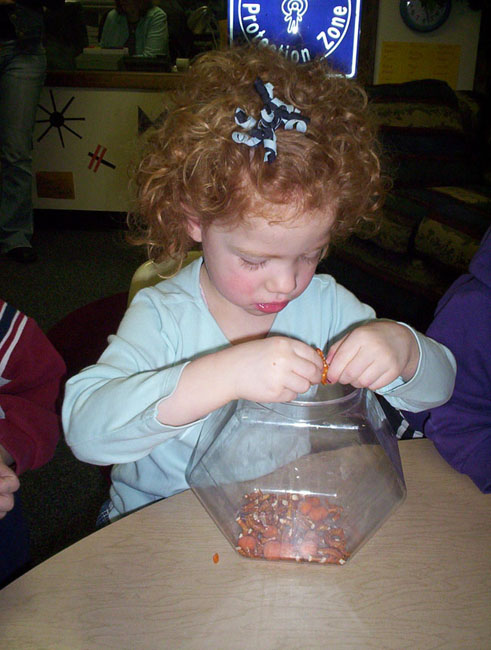
Figure 11. Placing carrots into the stomach.
The children put pretzel pieces and cut-up carrots into the plastic-bottle stomach. Next, the stomach was given a drink of water and sealed with a lid. The children noticed immediately that the pretzels started to break down and turn the water brown, just as would happen in a real stomach. The stomach model was placed on a shelf in the classroom for further observation. The children continued to check on the contents daily.
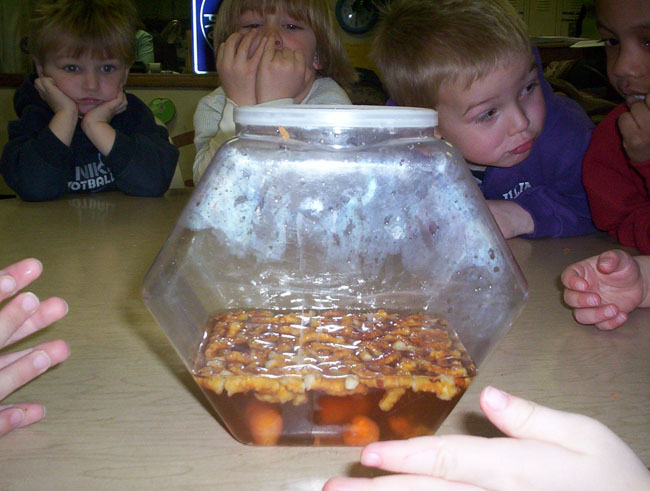
Figure 12. Children observe as "digestion" begins.
The construction of the model of a stomach started the ball rolling on creating a complete model of the human body. Every meeting time, the children added the names of body parts they wanted to include as part of the construction. The list of all the parts they wanted to add to the model included water, skin, hair, fingers, large intestine, small intestine, head, bones, feet, neck, legs, blood, heart, blood vessels, arteries, white blood cells, arms, hands, brain, muscles, eyes, mouth, nose, ears, chin, teeth, gums, forehead, cheeks, knees, spine, tongue, eyelashes, lungs, fingernails, toenails, shoulders, and glasses. Once the list was complete, Jason suggested that the class work on the model "lots of days!"
Adding Intestines
Two days later, Carol asked about making intestines to go with the model stomach. She had been conducting her own research at home. She had many different body books and shared many of her discoveries during Morning Meetings. A group of interested children gathered to plan what was needed to construct intestines. Carol suggested, "We can hook plastic tubes to the stomach so food can go down. The small intestine is skinnier but longer than the large intestine. We should have a bowl at the end for the poop to come out."
The children had many ideas about how to proceed. No plastic tubing was available, so at first they wanted to use a wrapping paper tube, but they realized that it did not have bends like real intestines. After some discussion, they decided to roll construction paper to make tubes and then bend the tubes to simulate the curves of intestines. They used tape to hold the bent forms and attach them to the model.
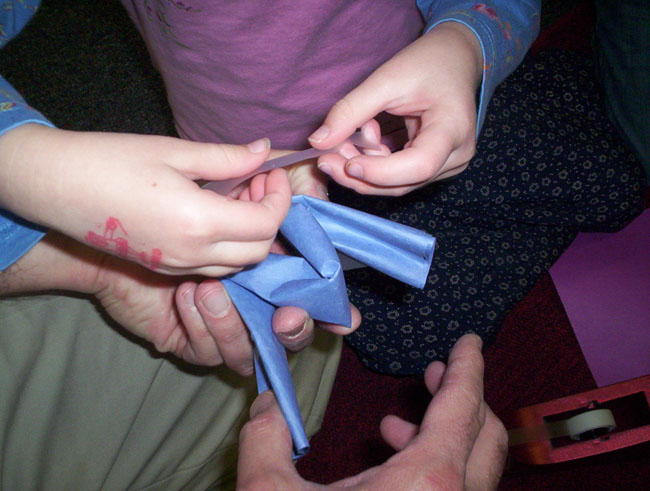
Figure 13. Taping the intestines together.
Building a Frame
A group of children gathered to construct a frame to support the model of the body. I brought in PVC pipe for the children to use. The class observed their own bodies and compared them to the supplies available, then devised a plan of action. Carol thought the center-coupling piece should be located where the lungs are in human bodies. The piping would form a sort of cross to represent the legs, shoulders, and neck. The group decided that the frame should be the same size as Corey. I cut the pipe to fit their idea.
After assembly, the frame would not stand on its own. The children wondered what to do to make it stand. When they tried leaning it against the wall, it fell. Someone suggested that it could be held it up with a pillow, but the children soon remembered that the pillows were needed at nap time. Someone thought that the model could be taped to the wall in the hall, but they realized that it would be hard to work on the model in the hall. Also, someone pointed out that lots of people walk by and might knock it over. Finally, Carol suggested placing the frame in a bowl. When we tried this strategy, it still fell over. The children tried taping the frame to the inside of the bowl, and it still fell. Soon the group decided that something heavy in the bowl might hold up the frame, but what? The children tried small blocks, large blocks, and water; none of them supported the frame well enough. Modeling clay worked...until someone touched the frame and it fell. At last, someone suggested using rocks in the bowl around the base of the frame—finally they had found a material that would support the model.
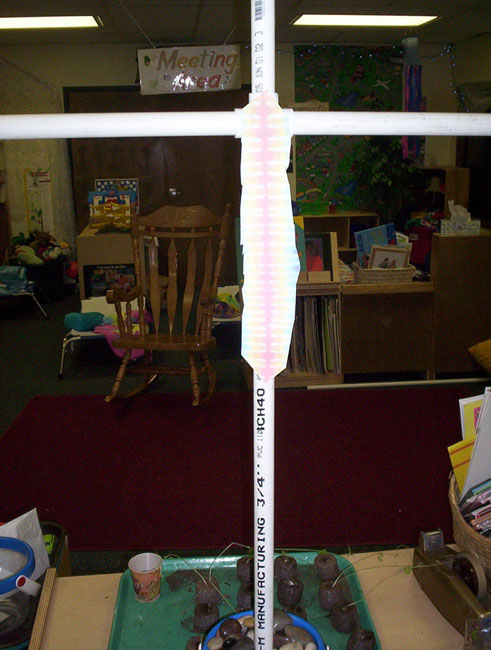
Figure 14. The frame for the model, with spine. 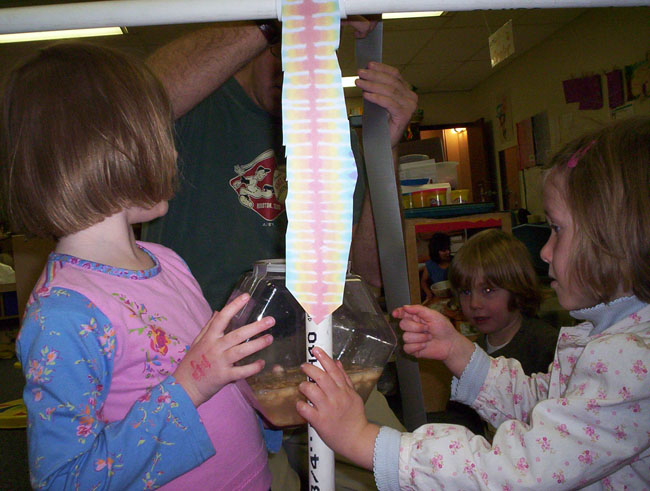
Figure 15. Attaching the stomach to the spine.
Some of the children worked on adding the digestive system to the model. First they attached the stomach with duct tape. Tape from the top to the bottom did not hold, so they decided they needed to add some tape around the sides of the stomach. The next challenge was attaching an esophagus. The children found a wrapping paper tube that they cut to fit from the stomach to the top of the frame. It was attached to the stomach with tape.

Figure 16. The completed digestive system.
Inserting the Heart and Lungs
A group of children added lungs and a heart to the model body. Mary (5.1 years) already had an idea for the lungs. She had been waiting until the digestive system was built to use balloons for the lungs. The only color of balloon available in the classroom was dark green, so the model would have green lungs. After filling the lungs with air, the group had to decide where to attach them. At first they thought that the lungs should be attached to the spine because if they were attached to the esophagus, food would go into the lungs when swallowed. They also thought that air did not go into the stomach, but after a conversation about burping, realized that air can go into the stomach sometimes.
The children put their hands on their chest and took a deep breath to feel the air go into their lungs, and they realized that the air does go into the esophagus just like food. The lungs were attached to the esophagus with clear tape. The children were still not sure why food does not go into the lungs. That was a question for another day!
Some children had ideas about making the heart out of paper, but not all the children thought that would work. Paper could not pump blood. Then Mel (3.7 years) exclaimed, "A balloon!" Carol (5.2 years) wanted to blow the balloon up with air until I helped her remember that there is not air in the heart. Mary said, "We can put water in it." To which Carol replied, "And add red food coloring" to simulate blood. The heart, a green balloon filled with red water, was then taped to the front of the body.
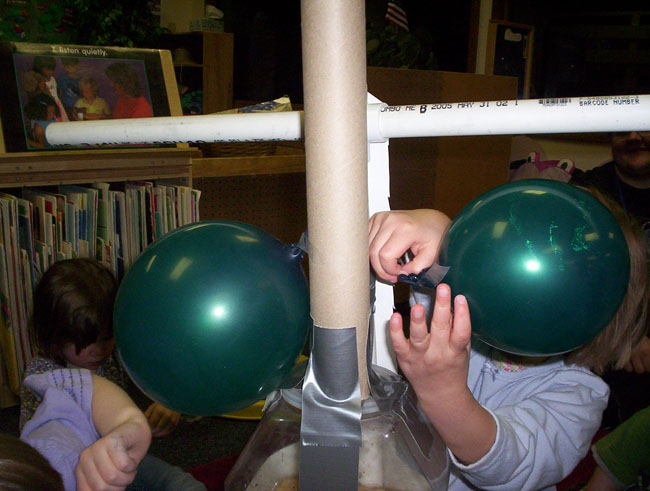
Figure 17. Attaching an inflated lung. 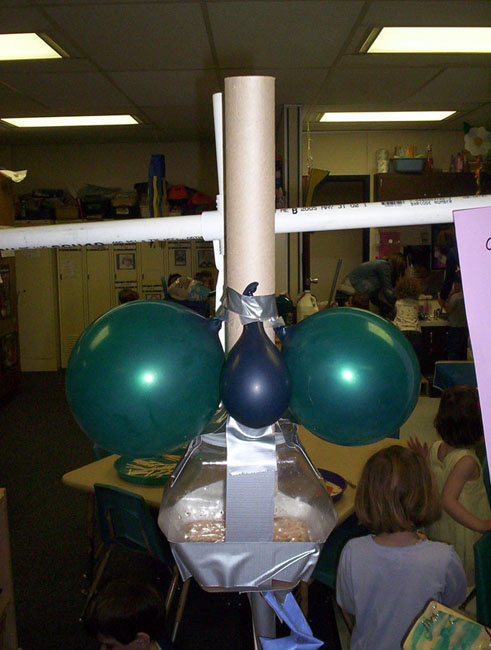
Figure 18. Lungs with the heart between them.
Constructing the Ribs
Next, the children wanted to add ribs to the model, to protect the organs. Many of the children helped to add ribs. The children and the teacher felt their own ribs to determine the shape needed to simulate ribs on the model. The group discussed what materials would be acceptable. Paper was turned down because it would not be hard enough to protect the organs. The children decided that cardboard would be the best option because it was strong and could bend around the organs like real ribs. No cardboard could be found in the art closet, but instead the group discovered large tongue depressors. When three tongue depressors were taped together, they could be bent around the organs to form a rib cage.
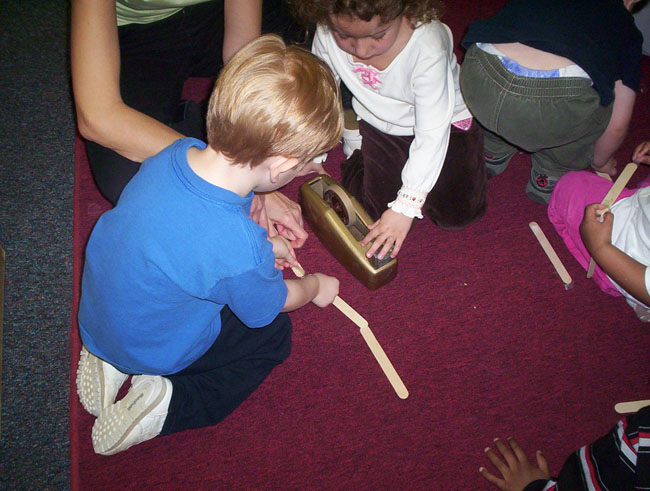
Figure 19. Constructing a rib. 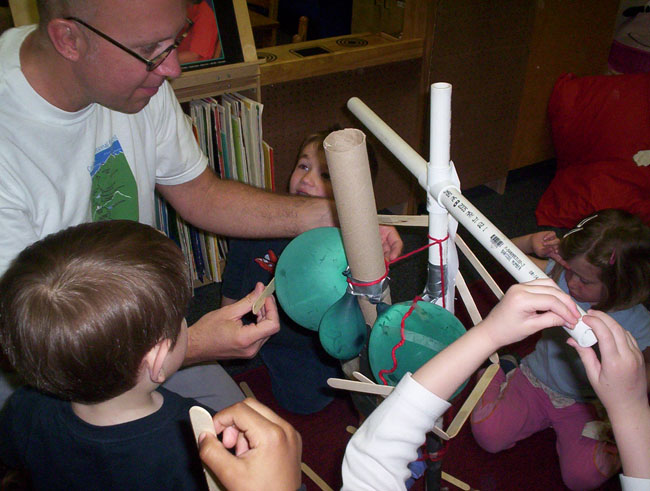
Figure 20. Attaching ribs to the spine. 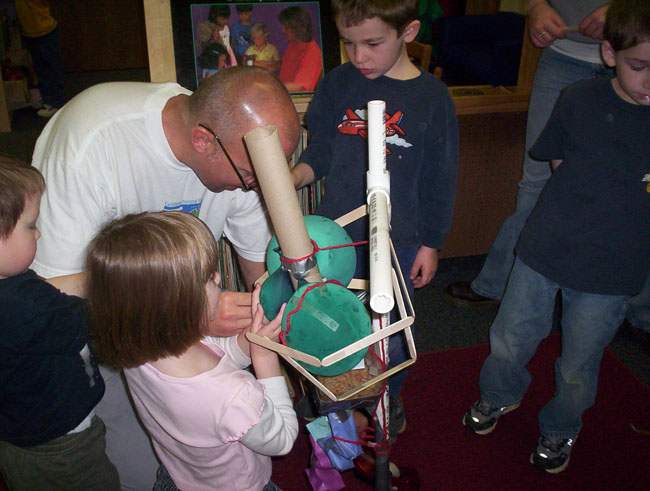
Figure 21. Securing the ribs at the sternum. 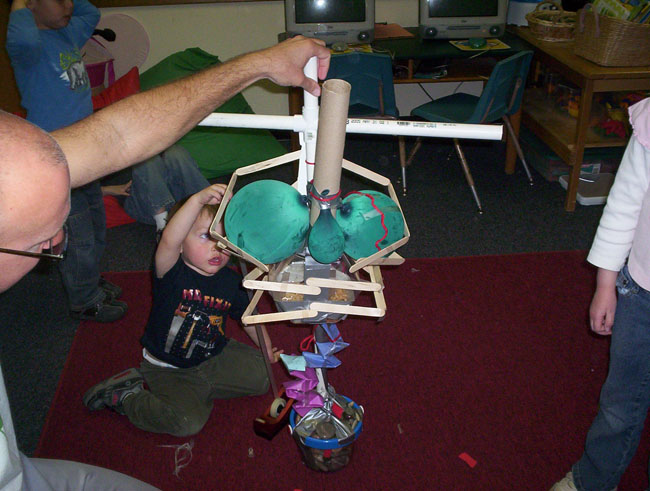
Figure 22. The ribs protecting vital organs.
Adding Arms
Because one of the lungs on the model had deflated, some of the children performed surgery to replace the lung. As they worked, they decided to add hands to the model, which meant that they would also need to add arms. Jason suggested using tubes. Because Corey was the original model for the frame, tubes were cut the same length as his arms. Carol suggested using strips of red paper (to represent blood) and tape to attach the arms to the frame. Then the children used tape to secure rubber gloves filled with paper to the arms.
An Identity for the Model
Around this time, the children voted to name the model "Bob." They also voted to assign a gender to the model, deciding that "Bob" would be a girl. 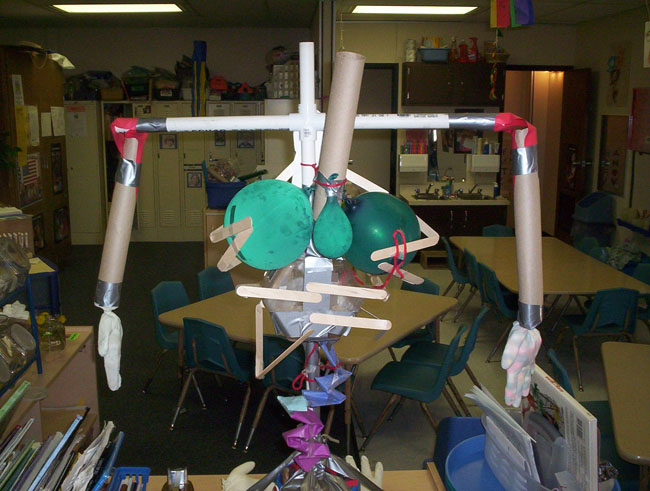
Figure 23. Bob with arms and hands.
The Brain
A small group of children constructed a model brain for Bob. The children could see the bumps and ridges of the brain in the X-ray images. After discussing what a brain looks like and viewing an X-ray of the brain, we went to the art closet to find bumpy materials. Selena (3.4 years) thought that cotton balls would work. The group then set about finding a way to make the brain material stick together. Declan (3.4 years) suggested tape, which did successfully hold the parts of the brain together. The children chose a clear plastic container for the head, and the brain was carefully inserted into it.
Now the children felt that Bob needed a face. Mary (5.1 years) tested markers, but the face was easy to wipe off with fingers. Next some children tried crayons, but the crayons would not write on the plastic. Finally, Carol (5.2 years) suggested drawing the face on paper and taping it onto the head. While Carol and Mary made a face on construction paper, Selena taped strips of yellow paper to the top of the head to give Bob hair.
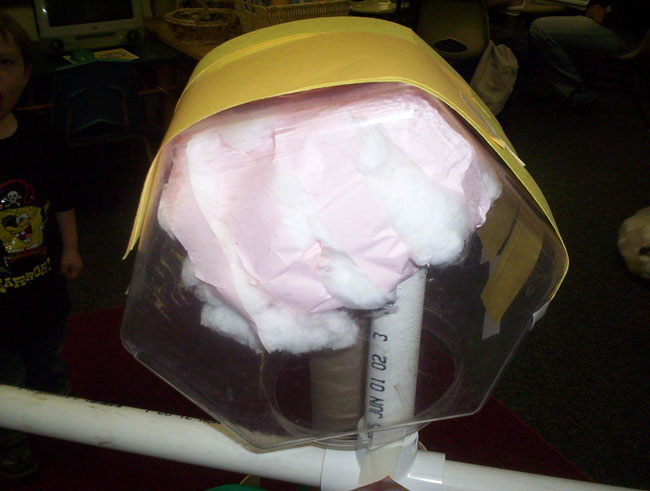
Figure 24. The brain inside the skull. 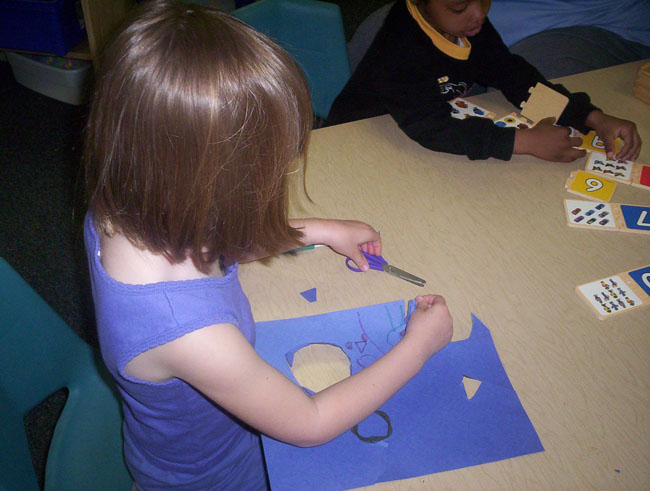
Figure 25. Cutting out facial features. 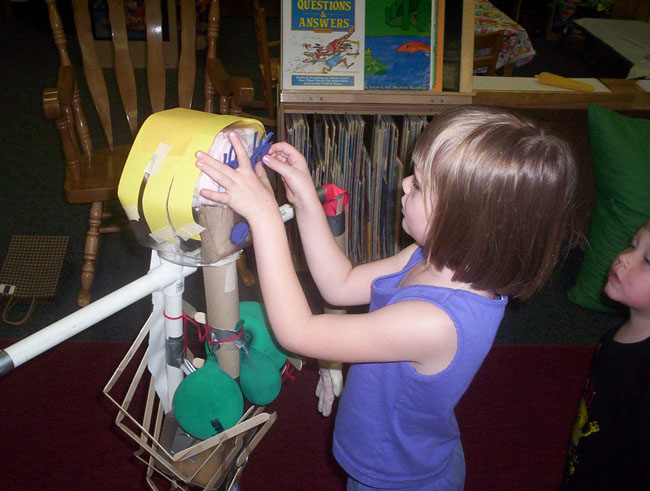
Figure 26. Applying the facial features with tape. 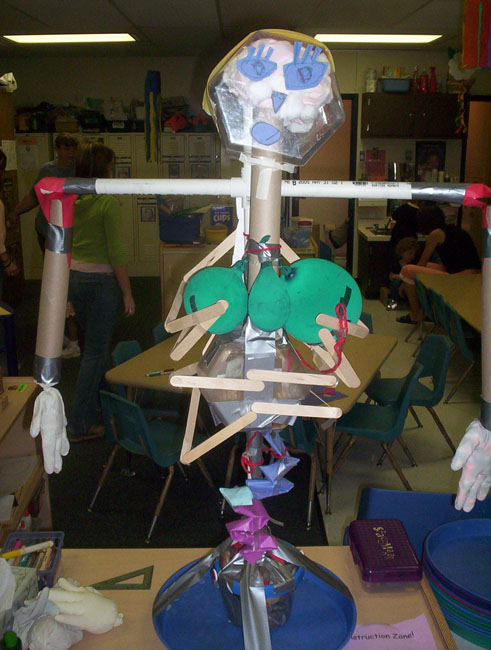
Figure 27. “Bob” is taking shape.
Bladder Work
Several of the children already knew that the bladder held urine and decided that "Bob" needed a bladder. After looking at an illustration of a bladder, Declan thought someone could draw a bladder for the model. Several children used markers on paper to sketch the bladder. Next the group voted on which drawing would be the best for "Bob." Brenn's (age 4.5) drawing won with 4 votes.
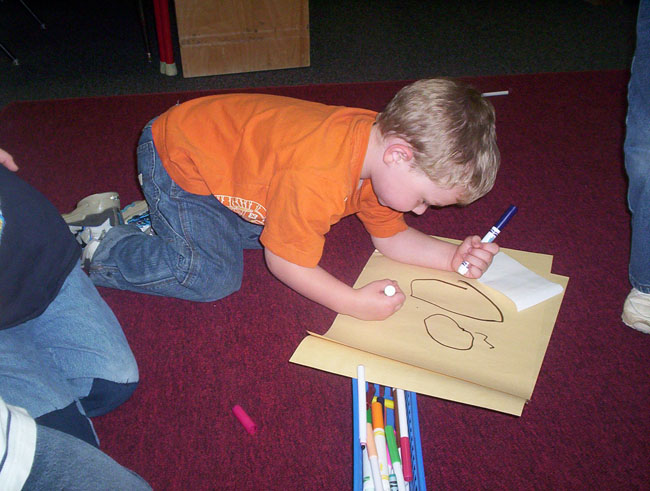
Figure 28. Drawing a bladder. 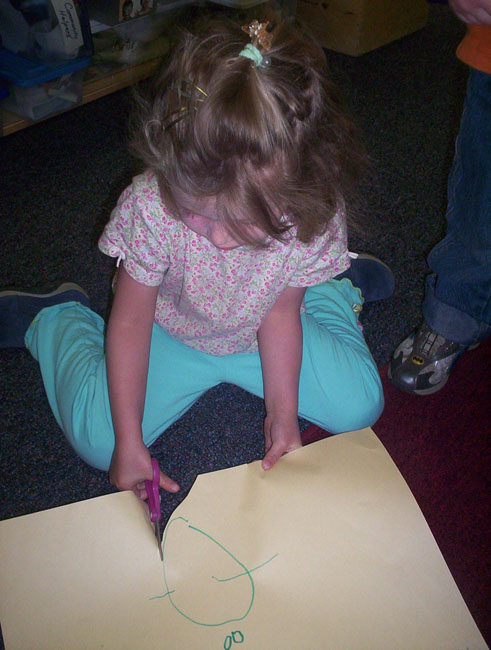
Figure 29. Cutting out the bladder. 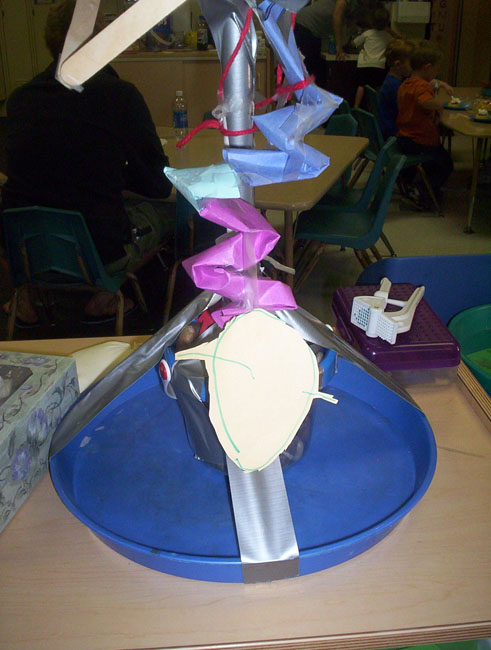
Figure 30. The bladder attached to the body.
And Now for the Legs
Next the children added legs to the model. Declan once again wanted to use paper to make the legs, but several other children in the group decided that cardboard tubes (like the ones used for the arms) would work better. After cutting the tube to make two legs of equal length, Erek thought that the legs should be taped to the tray holding "Bob" upright. After realizing that the tubes would not hold the body up, the children decided that "Bob" would be sitting.

Figure 31. Measuring the legs. 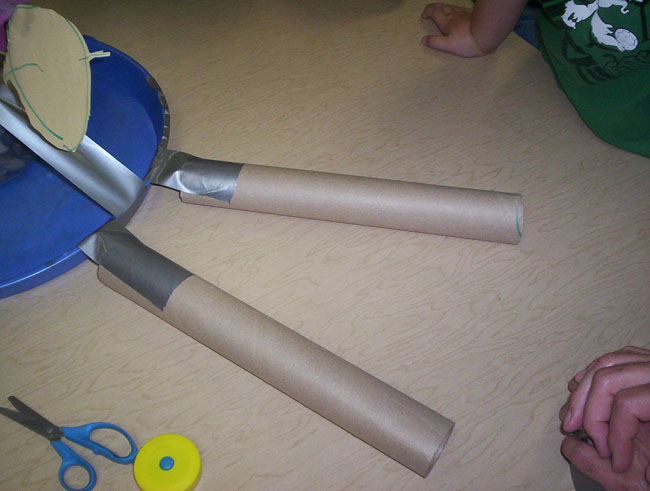
Figure 32. The legs are secured with duct tape. 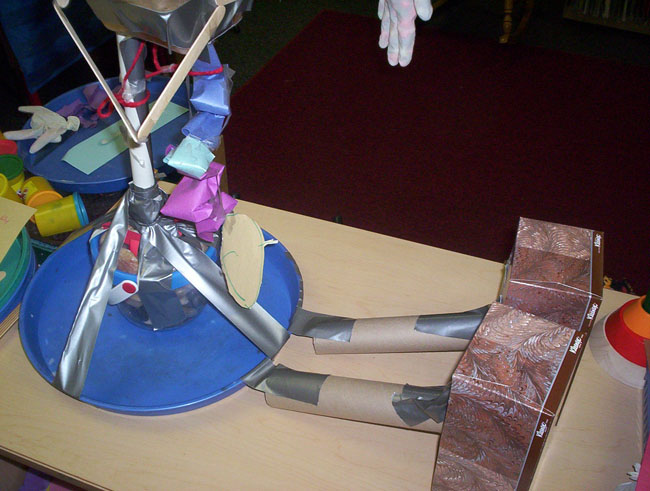
Figure 33. “Bob” with feet.
The children attached the legs, then wanted to add feet. Mary thought that the feet could be made of tape, but she could not figure out how that would work. Erek suggested using small boxes. Some children searched the room and found facial tissue boxes; they decided those could be the feet for the model.
The Liver and Kidneys
The children decided during one Morning Meeting that the model of the human body needed a liver and kidneys before skin was added. Carol (age 5.1) told everyone that these organs helped keep the blood clean. (She had once again been doing research on the topic at home.) Her classmates agreed this was an important function. An illustration of a liver was found in one of the new classroom books about the body.
A group of the younger children went to work to create the liver. The group discussed what to use to make the liver. The suggestion that seemed most viable to them was paper, which also happened to be Declan's (age 3.4) favorite material. The children wanted to make the liver more 3-dimensional and decided that it could be stuffed like a pillow. Riann (age 3.2) drew the liver. At first it was too small, so she made a larger sketch around her original drawing. Sam (age 3.11) used scissors to cut out the liver on two pieces of paper. They used tape to hold the paper together for stuffing. The children thought that the liver should be filled with blood. After brainstorming several ideas (red paint, crayons, markers), Dario (age 3.10) suggested red paper, and that is what they used.
The ribs had to be removed from one side of Bob's body to insert the liver next to the stomach. It was attached to the body with tape. At the same time, another deflated lung had to be replaced.
Another group of children drew kidneys to complete the internal organs of the model body. After reading that human bodies have two kidneys, the children used markers on construction paper and voted which kidney drawings would be attached to "Bob."
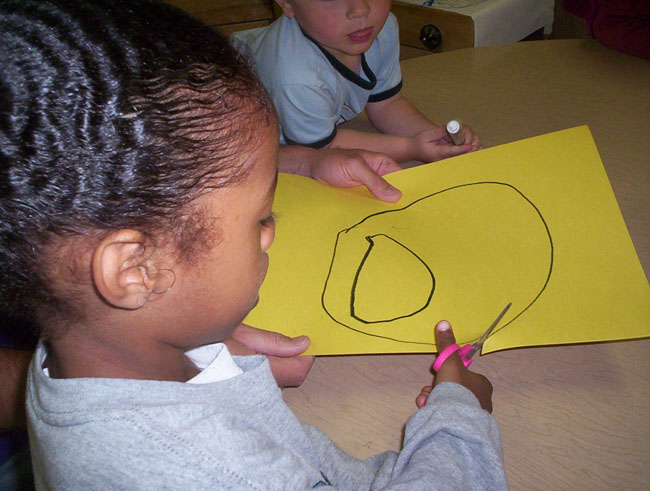
Figure 34. Cutting out the liver. 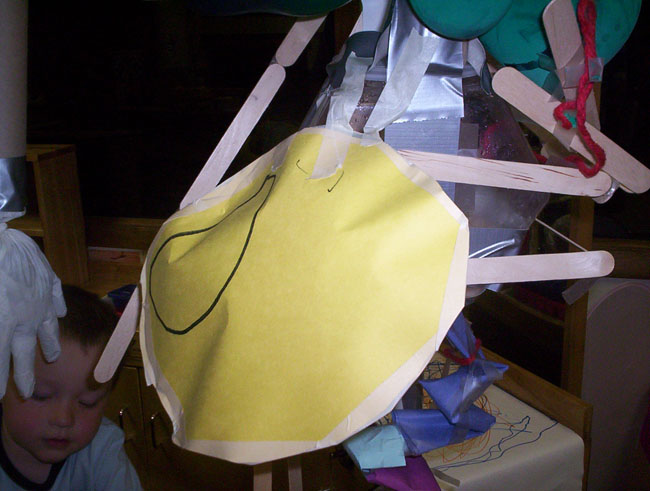
Figure 35. The stuffed liver, in the process of being mounted in Bob. 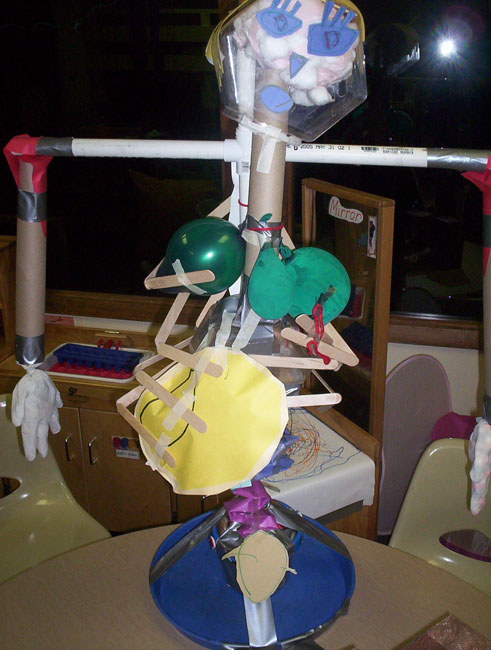
Figure 36. The ribs protecting the liver. 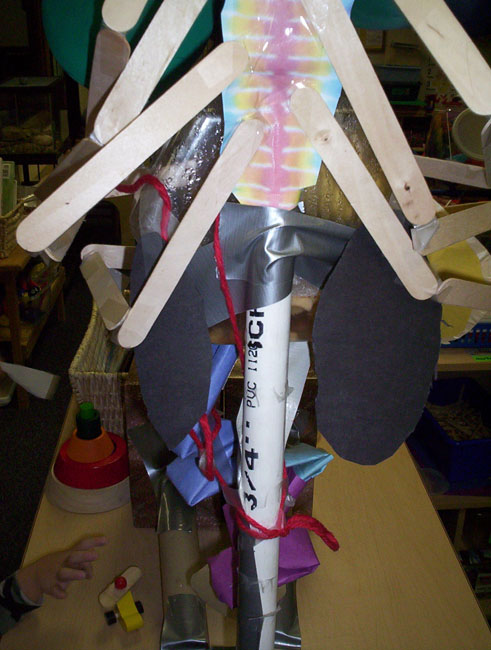
Figure 37. Two kidneys (black) added to the model.
Conversations about Bob
During the time Bob was being built, the children who worked on the model the day before would talk about their progress during Morning Meeting. This was a chance for classmates to ask questions and offer their suggestions. Informal sharing of information also took place outside of class meeting times. Many of the children talked about their work on Bob with their parents in the morning and in the evening at pick-up time. When student observers from university classes came to the room throughout the project, children were often very eager to explain their construction to the visitors.
The Final Step: Skin!
The class began to discuss adding skin to "Bob" to protect all of her organs. A group of children gathered to work on the skin. Declan (age 3.4) suggested using paper, but that posed a problem: the children wanted to still be able to see the internal organs. After testing several different colored papers and finding out that no one could see through them, the children searched the room for another option. They were still focused on paper until Sam (age 3.11), who had been creating a stained glass window, showed Martin (age 3.11) the colored cellophane he was using. They decided that the cellophane would work perfectly as skin for Bob.
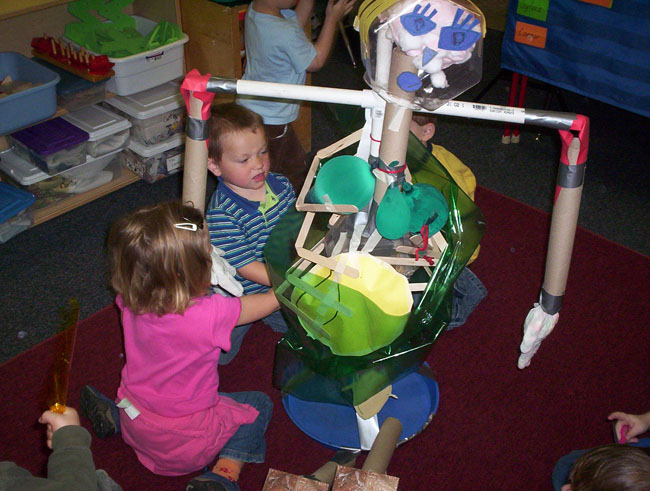
Figure 38. Wrapping the model in skin. 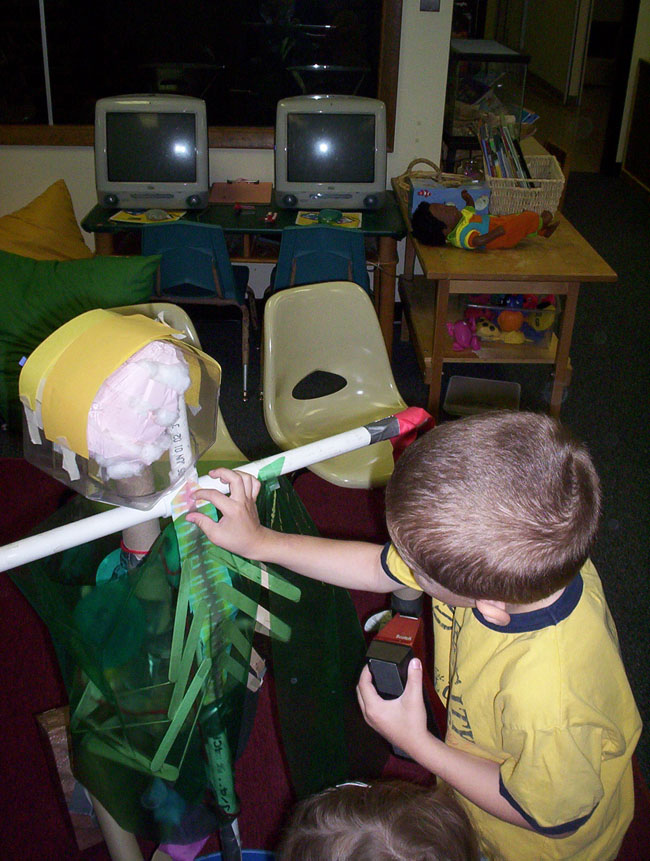
Figure 39. Securing the skin with tape. 
Figure 40. Rolling out more skin. 
Figure 41. The final touch-up.
With the addition of skin, "Bob" was complete! She stayed in the classroom until the end of the school year. The children were eager to describe the functions of all the parts to all visitors, and many of the visitors who had seen Bob under construction seemed to be as excited as the children when the model was finished.
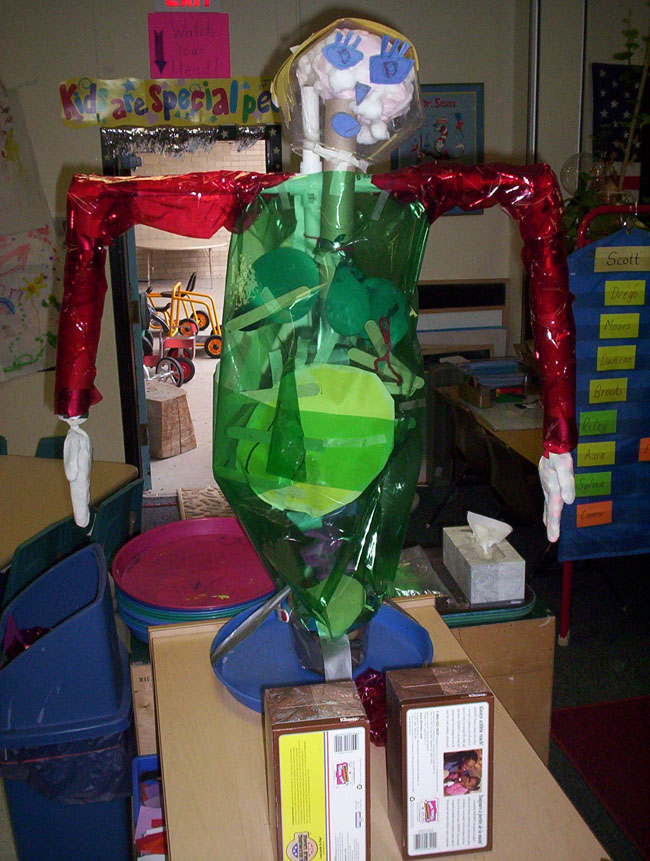
Figure 42. The completed model of the human body: Bob.
Designing and Building a Hospital Room
Another activity that was inspired by the study of the human body began during a Morning Meeting while Bob was under construction. Carol brought up the idea of turning the dramatic play area into a hospital. Many of the other children supported the idea, and work began on creating a hospital. Mary and Selena generated a list of materials that would be needed to transform the dramatic play area. The list, which was based on children's prior experiences with hospitals, included a doctor cart, phones, doctor tools, a dust pan and broom, food, a clock, changing table, a crib, a bed (for big kids and adults), a radio, books, a flashlight, a sink, gloves, blankets, clothes, toys, tissues, a vacuum, a doctor bag, paper, pens, shoes, plates, spoons, forks, knives, medicine, babies, and tools ("in case something gets broken"). On the following day, a group of children gathered materials from the list and constructed the hospital room.
Figure 43. Taking care of patients in the dramatic play area “hospital room.” 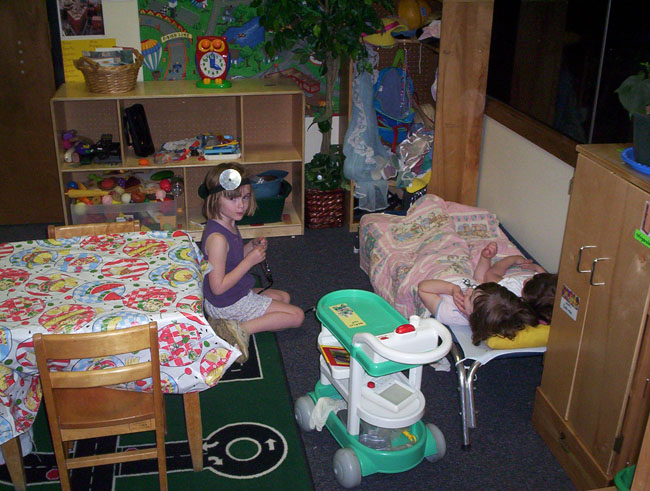
Figure 44. A semi-private room in the hospital.
Creating an X-Ray Machine
Some of the children were inspired by the guest speaker's knowledge of X-rays to create an X-ray machine for the hospital room. Construction began with a large cardboard box. The children tested several different materials to see which one they could see a shadow through. When a flashlight was focused on newsprint paper, the children could see the shadow of the person perfectly and allowed the group to trace the shadows and make their own "X-ray photos." 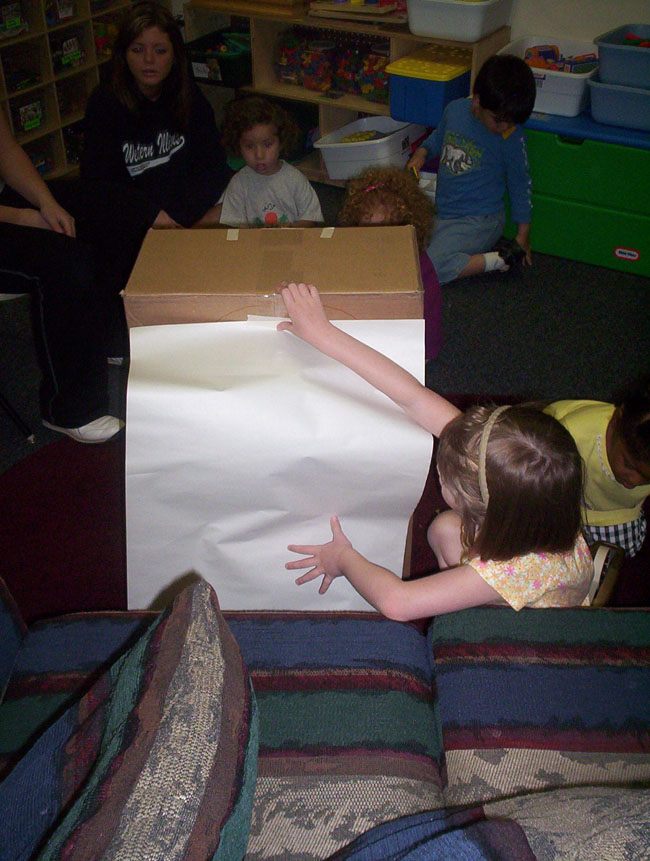
Figure 45. Attaching the X-ray screen. 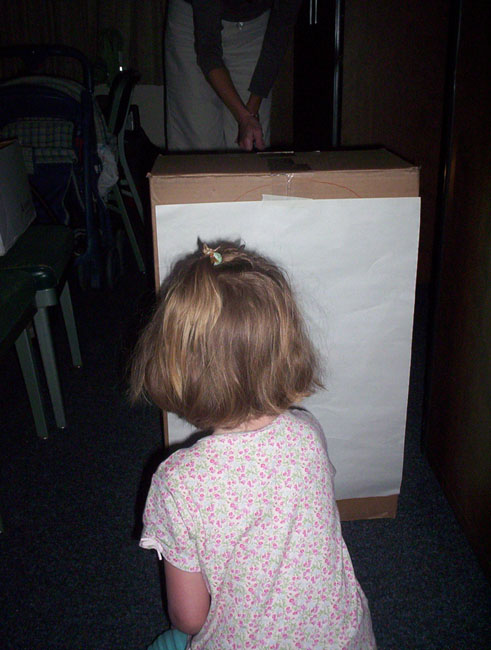
Figure 46. Tracing around a shadow to create an “X-ray.”
Phase 3: Writing a Book about the Body
The class decided to conclude the project by writing and illustrating a book in which they could share what they had found out about the human body, including the answers to many of the "Why" questions they had asked at the beginning of the study. They made drawings and dictated captions, which were then typed and printed. These included:
Sam (age 4.1): We put hands on Bob. We use our hands to hold forks and spoons. We pick up food with forks and spoons.
Aera (age 3.9): We have feet to walk.
Brenn (age 4.5): The legs help us walk.
Riann (age 3.4): You crunch the food with your teeth. The food breaks and you swallow it.
The sample pages below show the range of information the children included in the book.

Figure 47. Page from the children’s book: “We put the lungs in Bob. They help us breathe.” 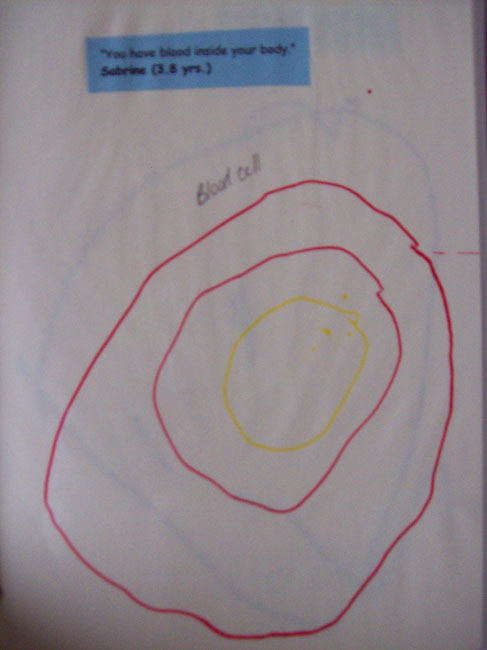
Figure 48. Page from the children’s book: “You have blood inside your body.” 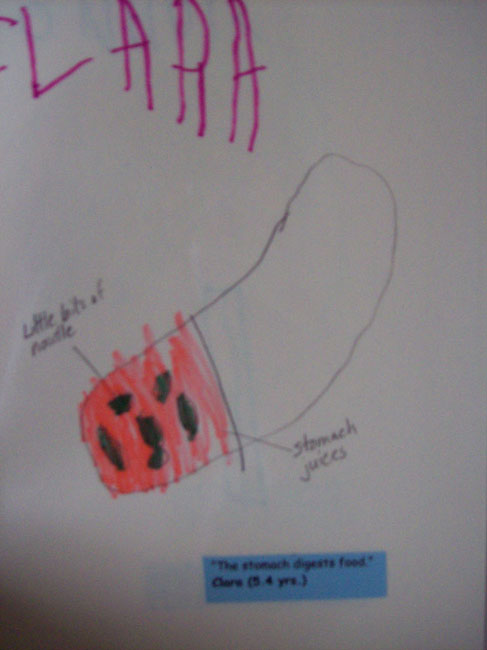
Figure 49. Page from the children’s book: “The stomach digests food.” 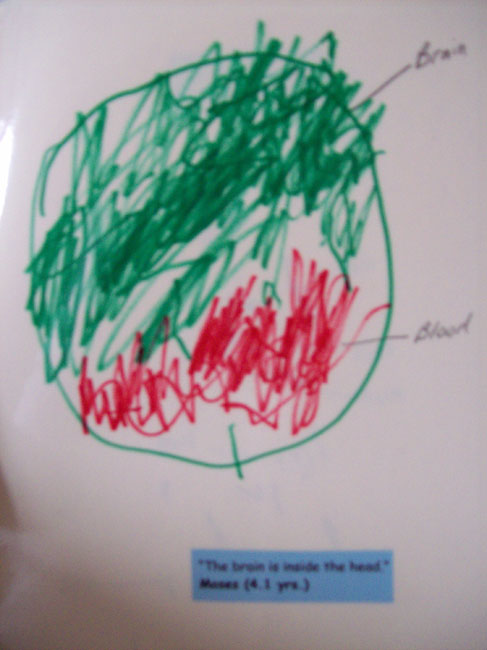
Figure 50. Page from the children’s book: “The brain is inside the head.” 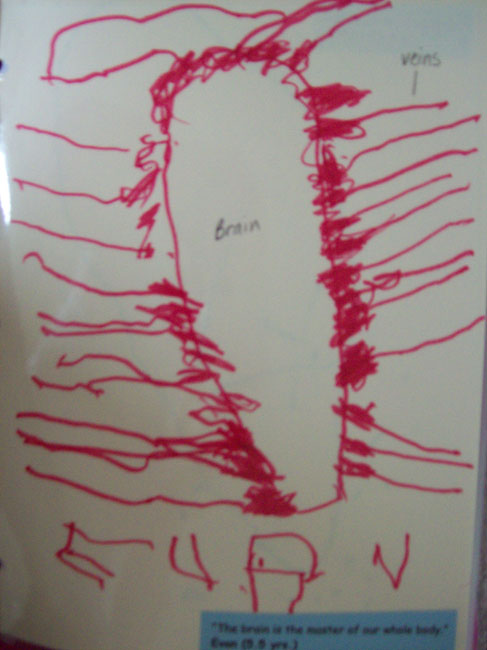
Figure 51. Page from the children’s book: “The brain is the master of our whole body.”
All of the children in the class participated in writing and illustrating the book, which was the principal way for them to share their new knowledge with their families at home. The children were able to check the book out and read it at home with their family and friends. After each of the children had a turn to take the book home, it remained in the classroom for the rest of the year.
Teacher Reflections
I found the Human Body Project to be very successful. The children were extremely focused in their investigation and had a clear idea of which direction the project would proceed. The research began with several of the older children leading the investigation, but by the end of the project, many of the younger children provided the driving force. Carol's relatively high level of participation was new for her. During the previous project, she had been rather quiet, but this topic was of great interest to her. When she shared information during Morning Meeting that she had gained at home, the other children became very excited about what she had found. Now that Carol attends public school, her younger sister, Selena, has become a leader in project work in my classroom.
I believe that the Human Body Project was successful in spite of some obstacles. I would have liked to have had comprehensible recordings of the children's rich conversations, but unfortunately the small classroom had no quiet area suitable for making intelligible recordings. I was not able to arrange site visits to medical facilities or similar places during the Human Body Project because of our student workers' schedules. (Fortunately, that situation has improved, and I have worked hard to include site visits in all of our projects in more recent semesters.) Finally, I would have liked to have had a better space for the children to work on the building of Bob. At the time, those activities generally took place in the middle of the classroom on the floor. The children who were not involved with the construction on any given day were forced to work around those who were working on Bob. Since that time, part of the problem has been alleviated by adding a "Project Room" (technically the classroom observation booth when it is not in use). This strategy has also helped the children working on the project concentrate on the task at hand.
The most significant change I noticed during this project compared to earlier activities was the children's determination to construct the model of a human body. The amount of time they spent on the planning, material gathering, and construction amazed me. Also, the cooperation among all of the children was impressive; consistently, they were willing to listen to other children's ideas and to compromise on the final construction.
I was often amazed to see the pride in all of the children when they would explain the daily construction of their model to their parents, student observers, and other visitors. The amount of time and energy they invested in this project (only their second exploration) was outstanding.
Author Information
Scott Brouette has been working with young children ages 2-6 years in a university setting since 1986. He has received bachelor of science degrees from Illinois State University in early childhood education, psychology, and mass communications. Scott has been the Lead Teacher at the Western Illinois University Preschool Center since the fall semester of 2005. Scott has presented at conferences throughout the United States and also in New Zealand. He is currently working on a master's degree in early childhood education at Western Illinois University.
Scott Brouette
Western Illinois University Preschool Center
Macomb, IL 61455
Email: S-Brouette@wiu.edu